


Course 1: Matatalab Lite helps educators learn how to use Matatalab Lite package and apply its related curriculum in their own classroom. Additionally, educators can also learn how to use activities and create their own. In the final lesson, educators will need to finish a final quiz to get the certificate of finishing this course. Details will be provided in the lessons' page.

1. Lesson Objectives: Understand different components' functions in Matatalab Lite, understand how to pair different parts, understand different modes in Matatalab Lite.
2. Time: 30 mins
3. Language: English
4. Format: Completely Online
5. Level: Beginner
1. Introduction Video
2. What's Included
3. Get Started Quickly
4. Control Mode
5. Coding Mode
6. Sensor Mode
7. Q&A
In Matatalab Lite, these are included:
1. MatataBot
2. Matatalab Figure Component
3. Controller
4. Lite Map
5. USB-C Cable
6. Matatalab Lite User Guide
7. Warm-Up Booklet
8. Challenge Booklet
9. Themed Sticker

3.1 Three Modes:
Control Mode; Coding Mode; Sensor Mode

3.2 How to Pair:
Press Power Button for 3 seconds to turn on the controller and MatataBot and they will pair automatically, when they pair successfully, there will be a "Ding" tone, both indicator lights will turn blue and stay on.

3.3 Modes Switch:
You can use the toggle button on the side of the controller to toggle between modes. From left to right are the control mode, coding mode, sensor mode.

4.1 Basic Control:
In Control Mode, students can use the buttons on the controller to control MatataBot move forward, move backward, turn left, and turn right. The music button can make MatataBot play random music, press the clear button to stop the music.

4.2 Hidden Features:
In Control Mode, there are several hidden features students can explore. The first is that students can press and hold the play button to finish a gyro control. Rotating the controller left or right will allow MatataBot to turn left or right, while rotating the controller forward or backward can make the robot move forward and backward. The second hidden feature is color detection, where students can press and hold the music button and play different sounds based on the different colors detected by the color sensor on the controller. The last one is that students can press and hold the clear button and shake the controller to play a racing game. The faster you shake, the faster MatataBot will move.

How to use:
In Coding Mode, students can send a program to MatataBot by pressing the buttons on the controller to input commands. There are specific lights on the controller (ie. Green, Blue, Yellow, Red, etc) This will help students remember their commands and help them run "debugging" jobs. Each forward and backward command will let MatataBot move approx. 100 mm in the required direction. Each turn command will let MatataBot to turn 90 degrees. Press the buttons to code, then press the Play button to start MatataBot. Press Play button whilst a sequence is running will stop the sequence. Press the Clear button to clear the coding step.


(Note: There are only 12 LED lights on the controller, the lights will be replaced when you input over 12, but the controller will still remember the previous commands)

5.2 Hidden Features:
Students can use Coding Mode to program MatataBot to draw different shapes.

Sensor Mode unlocks numerous functions of Matatalab products to help students experience advanced coding. There are different sensors (Microphone, Color Sensor, Distance Sensor, Light Sensor) built in the controller to help it judge obstacles, detect surround sounds, lights, and colors to send different commands to MatataBot. There are two ways to play sensor mode, the first one is to use the app, and the second one is to use the command tower combined with control board and sensor coding blocks from the Sensor Add-On package.

Q1: How to charge MatataBot and the Controller?
A1: Charge both the MatataBot and the Controller through the USB-C charging cable (A charging cable is included in the box, or use the common USB-C mobile phone charging cable to charge the two components at the same time).
Q2: When should I charge the MatataBot and the Controller? How long it will take?
A2: The blue light flashes quickly when the MatataBot or Controller power is low; the red light is always on during charging; the green light is always on when fully charged. The MatataBot charges for 1.5 hours and its working time is 5 hours; the Controller charges for 1.5 hours, and its working time is 8 hours.
Q3: How are they re-paired?
A3: Quickly press the power button on the Contoller three times. The Controller will launch the Bluetooth re-pairing mode, and it will quickly flash the blue light. · The sound "Ding", indicates that the Controller and the MatataBot have been successfully paired, and the indicator lights of both become blue.
Q4: What age is suitable for kids to use Matatalab products?
A4: Matatalab educational robot is designed for children from 3-9 years old. It is a very friendly programming enlightenment education product for children. It is suitable for kids from kindergarten to elementary school age.
Q5: Do children need to master programming in order to use Matatalab robots?
A5: No, children do not need any programming or reading knowledge.

1. Lesson Objectives: Know what is included in this curriculum, understand how to apply this curriculum in the classroom.
2. Time: 25 mins
3. Language: English
4. Format: Completely Online
5. Level: Advanced
1. Introduction
2. Preparation
3. Curriculum Implementation
4. Teaching Advice
Don’t know where to start? Start here! The Teacher Guide for Matatalab Lite has sixteen engaging lessons for you to do with your students. These lessons are sure to engage and inspire as you lead your students to discover, challenge and grow.
2.1 Content
Read the Teacher Guide to familiarize yourself with the content of a lesson.
2.2 Product
For this curriculum, you can use Matatalab Lite.

2.3 Materials
2.4 Classroom
It is important to ensure that the table or floor is clean and level, regardless of the method of instruction used. The map should be leveled to ensure the unobstructed movement of the robot.
Quick Overview: An introduction to the lesson to facilitate teachers' understanding of the main ideas.
Time: The reference time for the implementation of this lesson.
Goals: Please structure your teaching around these goals, which can be adapted to the actual situation of the students.
Computational Thinking: Computational thinking skills that are covered in this lesson and will be practiced by students via practical activities.
Curriculum Tie-ins: Other subjects covered in this lesson.
Theme Tie-ins: A theme summary for this lesson.
Related Children's Books: Books that are relevant to the topics in this lesson and that children can read to broaden their knowledge.
Materials: Equipment and materials needed to implement the curriculum.
Vocabulary: New vocabulary that will appear in this session, and explanations of the vocabulary.
Teacher Notes: A few notes for teachers in the course of their lessons.
Activity: Specific implementation elements in this lesson.
Extensions: Suggestions for extension tasks for uplifting students' abilities.

A detailed curriculum framework is provided to help you learn the main content of every lesson.
Please use the link below to download the Matatalab Lite curriculum framework:
Matatalab Lite Curriculum (click to download)
1. Please read the Quick Overview before each lesson to understand what is covered in that lesson.
2. Given the students’ young age, the goals can be appropriately adjusted to build self-confidence when they fail to meet them.
3. Get students to develop good habits during lessons. Example: ask students to care for the robots, switch the machines on and off themselves, and help the teacher organize the teaching aids at the end of the lesson.

1. Lesson Objectives: Know what is Activity in Matatalab, understand the template of the Activity, Understand the sample of Matatalab Activity, understand how to use Matatalab Activity Creator Tool, understand how to create your own activities.
2. Time: 25 mins
3. Language: English
4. Format: Completely Online
5. Level: Advanced
1. Introduction
2. Matatalab Certified Educator (MCE)
3. How to Create Your Own Activity
4. Matatalab Activity Cards Sample: Travel in the Universe
Matatalab Edu provides rich activities in addition to curriculums. Educators can find the activities they desire to teach according to the content category: such as maths-related activities, music, and arts-related activities, ELA related activities, social study-related activities, competitive activities, PBL activities, etc. More accurate activities based on students’ age and products could also be found.
For the past two years, Matatalab has collected lots of feedback from educators around the world. Several outstanding educators shared their excellent classroom activities or lessons using Matatalab products on our social media. This has made us think about how to create a communication platform for enthusiastic and experienced educators. The Matatalab Edu Activity Website has been developed as a result. Through this platform, educators do not only find some classroom activities created by Matatalab Edu but also create and share more and more interesting classroom activities based on their own experience using Matatalab products. We firmly believe that fantastic classroom activities must come from educators who use Matatalab products in their classrooms.
After going through several existing activities, educators may have an idea on how to create a qualified Matatalab activity.
To help educators get to know Matatalab better, we provide three self-guided courses: Matatalab Edu Lite Course, Matatalab Edu Coding/Pro Set Course, and Matatalab Edu Coding Advanced Course. A corresponding certificate will be awarded at the end of each course.


Once the educator completes one of the three courses and gets one Course Certificate, they will move to the second level: create their own activities.Once the educator provides 6 qualified activities per year, Matatalab will award the coressponding title of Matatalab Certified Educator to him/her.
The educator who completes the Lite course shall provide 6 activities based on Matatalab Lite.

The educator who completes the Coding/Pro Set Course shall provide 6 activities based on Matatalab Coding/Pro Set.

The educator who completes the Coding Advanced Course shall provide 6 activities based either on Animation Add-on or Sensor Add-on.
")
All the MCE will be placed in Matatalab Edu talent pool. Matatalab Edu hopes to have further cooperation with the MCE. The MCE will benefit in several ways:
1. Award of the MCE Certificate and T-shirt worth 30 USD.
2. Matatalab will select excellent created activities by the MCE, and assemble them into books. The MCE as the contributor, his/her name will appear in the published book.
3. When Matatalab launches its latest products, such as new maps and activity packages, the MCE can apply for and stand the chance to get them for free.
4. Matatalab participates in educational exhibitions all around the world every year. Such as the ISTE (the U.S.), BETT (the U.K.), FETC (the U.S.), MIEF(Russia), STEM EXPO (Japan), etc. On these occasions, Matatalab invites the MCE to either host a workshop or a presentation.
5. Matatalab will select outstanding MCE in each country and region as our guests or partners to take part in the Virtual Training or On-Side Workshop.
All interpretation rights reserved for Matatalab.
3.1 Activity Template
Before creating a Matatalab Edu activity, please take a look at our activity/lesson template. The template can be downloaded from: Matatalab Activity

In a template, these parts are included:
3.1.1 Classroom Key Information
3.1.2 Activity/Lesson Key Information
3.1.3 Matatalab Products and Supplementary Materials
3.1.4 Detailed Activity Plan
3.1.5 Essential Questions
3.1.6 Supporting Files.
3.1.1 Classroom Key Information:
3.1.2 Activity/Lesson Key Information:
3.1.3 Matatalab Products and Supplementary Materials:
3.1.4 Detailed Activity/Lesson Plan:
Note: If you are struggling using the Matatalab Edu classic activity plan template, other lessons/template formats are also acceptable. However, please write the instructions step by step. These steps should be clear, concise, and easily understood by other teachers who prepare the activity for their class.
Teacher’s notes are encouraged to be added to the activity plan.
3.1.5 Essential Questions:
List the questions that students may ask and that need to be figured out in the activity.
3.1.6 Supporting Files:
Are there any other materials you can share with other educators? Some great supporting files include:
3.2 Matatalab Creator Tool:
After using the template to create your own activities, you can use our Matatalab Creator Tool system to submit your activities to us.
1. Lesson Objectives: Pass the quiz to receive the Matatalab Lite Course Certificate
2. Time: 20 mins
3. Language: English
4. Format: Completely Online
5. Level: Advanced
Final Quiz
Please the use window below to finish the final quiz. If your grade is equal or higher than 8 points, you will receive the certificate by email. Please enter the correct email address so that we can send you the certificate. The whole quiz could be around 20 minutes.

Course 2: Matatalab Coding/Pro Set helps educators learn how to use Matatalab Coding Set, Matatalab Pro Set, and their add-on pacekages: Artist Add-On and Musician Add-On. Curriculums provided in this course will cover all of these packages and educators can learn how to apply them in classroom.
Additionally, educators can also learn how to use activities provided online and even create their own. In the final lesson, educators will need to finish a final quiz to get the certificate of finishing this course. Details will be provided in the lessons' page. You can use the list below or the menu left to navigate to lessons.

1. Lesson Objectives: Know what is included in Matatalab Coding Set; know how to pair; understand the various coding blocks; understand how to place coding blocks and finally how to start coding.
2. Time: 30 mins
3. Language: English
4. Format: Completely Online
5. Level: Beginner
1. Introduction
2. What's Included
3. Coding Blocks
4. Get Started Quickly
5. Practice
6. Q&A
Matatalab Coding Set is an Entry-Level Hands-on Coding Robot Set for kids aged 4-9. Lets kids develop the necessary cognitive abilities and learn coding skills from a young age. Kids use their imagination to create infinite possibilities using coding blocks, by controlling a robot car through coding algorithms. Kids receive instant feedback, and quickly learn that coding is simple.
In Matatalab Lite, these are included:
2.1 MatataBot
2.2 Command Tower
2.3 Control Board
2.4 Nature Map
2.5 Challenge Booklets
2.6 Coding Blocks
2.7 Obstacles
2.8 Flags
2.9 USB-C Charger


Coding blocks are the main components of Matatalab Coding Set. There are 5 kinds of coding blocks in Matatalab Coding Set which are:
3.1 Motion Coding Blocks:
There are 16 Motion coding blocks in total: 4 Move Forward coding blocks, 4 Move Backward coding blocks, 4 Left Turn 90°, and Right Turn 90°. Placing them on a Control Board can make MatataBot complete some directional movements.

3.2 Loop Coding Blocks:
There 4 Loop coding blocks in total: 2 Loop Begins coding blocks, and 2 Loop Ends coding blocks. Placing them on a Control Board can make MatataBot complete some directional movements.

3.3 Function Coding Blocks:
There are 4 Function coding blocks in total: 1 Define Function coding blocks, and 3 Call Function coding blocks. Placing the Define Function coding blocks on the Control Board with other coding blocks can define a function while using the Call Function coding blocks can make MatataBot call this function when the need arises.

3.4 Number Coding Blocks:
There are 10 number coding blocks: 2 Number 2, Number 3, Number 4, Number 5, and Random Number (1-6). Placing them on the Control Board with other coding blocks can be used as a parameter.

3.5 Fun Coding Blocks:
There are 3 Fun coding blocks: Random Movement coding blocks, Preset Music coding blocks, Preset Dancing coding blocks. Random Movement coding blocks can make MatataBot move at random. Preset Music coding blocks can make MatataBot play preset music randomly. Preset Dancing coding blocks can make MatataBot perform preset dance movements randomly.

4.1 How to pair:
Press and hold the power button for 2 seconds to turn on the MatatatBot and Command Tower. Pairing is successful when the prompt sound is heard. After a successful pairing, the blue lights of the MatataBot and Command Tower will stay on.

4.2 Control Board and Command Tower:
Correctly place the Command Tower on the port of the Control Board to connect them:

4.3 Coding Blocks Placement:
There is one important note when placing coding blocks on the Control Board: make the notch face down. After placing the coding blocks, press the start button so that MatataBot will execute its commands.


You can practice if you own a MatataBot Coding Set. If you do not have one, please use the window below to complete a practice.
Q1: How to charge MatataBot and the Command Tower?
A1: Charge both the MatataBot and the Command Tower through the USB-C charging cable (A charging cable is included in the box, or use the common USB-C mobile phone charging cable to charge the two components at the same time).
Q2: When should I charge the MatataBot and the Command Tower? How long it will take?
A2: The blue light flashes quickly when the MatataBot or Command Tower power is low; the red light is always on during charging; the green light is always on when fully charged. The MatataBot charges for 1.5 hours and its working time is 5 hours; the Command Tower charges for 3.5 hours, and its working time is 5 hours.
Q3: How are they re-paired?
A3: Quickly press the power button on the Command Tower three times. The Command Tower will launch the Bluetooth re-pairing mode, and it will quickly flash the blue light. · The sound "Ding", indicates that the Command Tower and the MatataBot have been successfully paired, and the indicator lights of both become blue.
Q4: What age is suitable for kids to use Matatalab products?
A4: Matatalab educational robot is designed for children from 3-9 years old. It is a very friendly programming enlightenment education product for children. It is suitable for kids from kindergarten to elementary school age.
Q5: Do children need to master programming in order to use Matatalab robots?
A5: No, children do not need any programming or reading knowledge.

1. Lesson Objectives: Understand what is sequencing in coding and Matatalab; understand how to use Motion coding blocks and Number coding blocks to create a program and make MatataBot operate.
2. Time: 20 mins
3. Language: English
4. Format: Completely Online
5. Level: Beginner
1. Introduction
2. Motion
3. Parameter
4. Practice

In Matatalab Coding Set, there are 12 Motion coding blocks: 4 Move Forward coding blocks, 4 Move Backward coding blocks, 4 Turn Left coding blocks, 4 Turn Right coding blocks.
Placing Motion coding blocks on the Control Board correctly can make MatataBot move forward and backward, or turn left and right. If a series of Motion coding blocks are placed on the Control Board, the Command Tower will read these commands and MatataBot will complete these movements in a specific order, which is from left to right and from top to bottom.


Matatalab Coding Set also provides Number coding blocks.
In Coding Set, there are two functions of Number coding blocks. The first one is to be used with move forward or backward coding blocks. It can make MatataBot execute this command as many times as the number on the Number coding blocks. For example, when the move forward coding blocks with number 2 coding blocks are used, MatataBot will move 2 steps forward 2 steps (Note: Number coding blocks cannot be used with turn left or right coding blocks).

Number coding blocks can also be used with Fun coding blocks. When using Number coding blocks and Fun coding blocks together, it means MatataBot will choose the corresponding built-in programs and execute according to the number. For example, when using the Number 2 coding blocks with Preset Music coding blocks, MatataBot will perform the 2nd preset dance movement.

For this lesson, you can practice if you own a Matatalab Coding Set. If you do not have one, please use the window below to get familiar with sequencing, Motion coding blocks, and Number coding blocks.

1. Lesson Objectives: Understand what is a loop in coding and Matatalab; understand how to use Loop coding blocks and how it is used together with Motion coding blocks and Number coding blocks.
2. Time: 20 mins
3. Language: English
4. Format: Completely Online
5. Level: Intermediate
1. Introduction
2. User Guide
3. Practice
In the Matatalab Coding Set, there are 4 Loop coding blocks: 2 Loop Begins coding blocks and 2 Loop Ends coding blocks. Loop coding blocks have to be used in pair, and it must start with Loop Begins coding blocks and end with Loop Ends coding blocks. Loop coding blocks are usually used with Number coding blocks, and Number coding blocks only need to be placed under Loop Begins coding blocks. This means that the commands between Loop Begins and Loop Ends coding blocks will be repeated a corresponding number of times.

2.1 Movements
There are usually two ways to use Loop coding blocks. The first one is for the MatataBot to make repeated movements.

2.2 Drawing
Using Loop coding blocks can make MatataBot draw different basic shapes. If Angle coding blocks are added, complex shapes can be also completed.

For this lesson, you can practice if you own a Matatalab Coding Set. If you do not have one, please use the window below to get familiar with Loop coding blocks, Motion coding blocks, and Number coding blocks.

1. Lesson Objectives: Understand what is Function in coding and Matatalab; understand how to use Function coding blocks and how it is used with other coding blocks.
2. Time: 20 mins
3. Language: English
4. Format: Completely Online
5. Level: Intermediate
1. Introduction
2. User Guide
3. Practice
There are 4 Function coding blocks in the Matatalab Coding Set: 1 Define Function coding blocks;2 Calling Function coding blocks. Function coding blocks must be used in pair, and students need to first use Define coding block and later Calling Function coding blocks. The Define Function can be called more than once. There is one important factor with the Function coding blocks: Define Function coding blocks cannot be placed on the same line as is the case with the Calling Function coding blocks. Namely, the Define Function coding blocks must be placed on the line below the Calling Function coding blocks. Function coding blocks cannot be combined with Number coding blocks.
2.1 Basic Usage
Using Function coding blocks can make programs more concise, especially when MatataBot needs to make complex movements.
2.2 Advanced Usage
Function coding blocks can also be used with other coding blocks, such as Loop coding blocks, in order to complete an advanced usage of Matatalab.
For this lesson, you can practice if you own a Matatalab Coding Set. If you do not have one, please use the window below to get familiar with Function coding blocks, Motion coding blocks, and Number coding blocks.

1. Lesson Objectives: Know what is included in Matatalab Artist Add-On; understand how to use Angle coding blocks with Motion coding blocks; understand how to use MatataBot to draw different shapes.
2. Time: 25 mins
3. Language: English
4. Format: Completely Online
5. Level: Intermediate
1. Introduction
2. What is Included
3. User Guide
4. Practice
In Lesson 5 and Lesson 6, we will learn Matatalab Artist Add-On package and Matatalab Artist Add-On package.
For Matatalab Artist Add-On package, kids can draw beautiful graphics and pictures through programming, towards the more advanced stages of coding their mathematical theories of geometry also improves. *Coding Set is required to work with.
Note: If you do not want to buy Matatalab Coding Set and Artist/Musician Add-On package separately. We have Matatatlab Pro Set available, which includes all of the components of Matatalab Coding Set and Artist/Musician Add-On package. More details: Matatalab Pro Set
2.1 20 Angle Coding Blocks
2.2 3 Colored Pens
2.3 3 Warm-up Cards (6 samples)
2.1 Angle Coding Blocks:
Two kinds of items are included in the Matatalab Artist Add-On package: Angle coding blocks and colored pens. For Angle coding blocks, there are 10 angles in this package, and every angle has two coding blocks: 30 degrees, 36 degrees, 45 degrees, 60 degrees, 72 degrees, 108 degrees, 120 degrees, 135 degrees, 144 degrees, and 150 degrees.
2.2 Colored Pens:
For colored pens, there are 3 random colored pens included. They can be placed in the MatataBot pen holding place.
2.3 Warm-up Cards:
There are 3 warm-up cards (6 samples) included. Students and teachers can use these samples to get familiar with MatataBot's drawing.
Placing colored pens in the MatataBot pen holding space and using Motion coding blocks, Angle coding blocks, and Loop coding blocks together can make MatataBot draw different shapes on paper. It is important to note that, the MatataBot is drawing the supplementary angle on the Angle coding blocks, and Angle coding blocks can be only used with Turn left/right coding blocks. Two samples are provided below:
Sample 1: Triangle
Sample 2: Star
For this lesson, you can use the samples below to practice if you own a Matatalab Coding Set and Artist Add-On, or a Matatalab Pro Set. If you do not have one, please use the online practice below to get familiar with Matatalab Artist Add-On package.
4.1 Practice Samples:
4.2 Online Practice:
Note: Drag and rotate MatataBot to start drawing. Press Space to erase all.
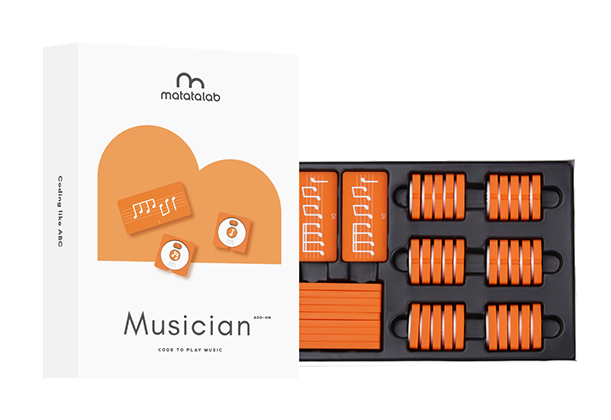
1. Lesson Objectives: Know what is included in Matatalab Musician Add-On; understand how to use Music coding blocks and Melody coding blocks; understand how to use MatataBot to play different music.
2. Time: 25 mins
3. Language: English
4. Format: Completely Online
5. Level: Intermediate
1. Introduction
2. What is Included
3. User Guide
4. Practice
Kids learn notes and beats through programming. With the free combination, kids can compose their favorite music, or even create their own now!
Coding Set is required to work with.
Note: If you do not want to buy Matatalab Coding Set and Artist/Musician Add-On package separately. We have Matatatlab Pro Set available, which includes all of the components of Matatalan Coding Set and Artist/Musician Add-On package. More details: Matatalab Pro Set.
2.1 16 Alto Clef Music Coding Blocks
2.2 16 Treble Clef Music Coding Blocks
2.3 10 Melody Coding Blocks
2.4 3 Warm-up Cards (6 samples)
2.1 Music Coding Blocks:
There are two kinds of Music coding blocks in the Matatalab Musician Add-On package: Alto Clef Music Coding Blocks and Treble Clef Music Coding Blocks, with 16 each. They can make MatataBot play sounds with different pitches.
2.2 Melody Coding Blocks:
There are 10 Melody coding blocks that can make MatataBot play the preset melody so as to enjoy more fun in using Matatalab.
2.3 Warm-up Cards:
There are 3 warm-up cards (6 samples) included, students and teachers can use these samples to get familiar with how to use MatataBot to play different music.
Placing Music coding blocks or Melody coding blocks on the Control Board, the Command Tower will read the coding blocks, and then MatataBot will play different sounds or music.
3.1 Music Coding Blocks
When using Alto Clef Music Coding Blocks or Treble Clef Music Coding Blocks, you need to shuffle the coding blocks through Do-Ti to choose the scale you want MatataBot to play.
Please watch the video below to learn how to use Alto Clef Music Coding Blocks or Treble Clef Music Coding Blocks.
3.2 Beat
The beat of the sound can change when using Music coding blocks with Number coding blocks. The preset beat of one coding block is 1/4 beat. So, if the Number 2 coding block is used with one Music coding block, the beat will become 2/4 beat. Please watch the video below to get the difference between Music coding blocks and Number coding blocks.
3.3 Compose a Song
Using Music coding blocks together with the Number coding blocks can help teachers and students compose a song so as to enjoy the fun of playing music.
For this lesson, you can use the samples below ti practice if you own a Matatalab Coding Set and Musician Add-On, or a Matatalab Pro Set.
4.1 Practice Samples:

1. Lesson Objectives: Know what is included in this curriculum, understand how to apply this curriculum into the classroom.
2. Time: 20 mins
3. Language: English
4. Format: Completely Online
5. Level: Intermediate
1. Introduction
2. Preparation
3. User Guide
4. Teaching Advice
Learning Station Curriculum has 2 main parts: Teacher Guide and 12 lessons. These 12 lessons are divided into 4 units. Teacher Guide can help them understand how to use Matatalab Coding/Pro Set, how to apply it in classrooms, and the aligned standards. Teachers can use these 12 lessons to help students learn how to use Matatalab Coding/Pro Set and develop both their computational thinking and 21st-century skills. In this lesson, teachers will learn how to make preparation in view of using this curriculum in their classrooms, how to use this curriculum when teaching, and some teaching advice.
2.1 Content
Read the Teacher Guide to familiarize yourself with the content of a lesson.
2.2 Product
For this curriculum, you can use Matatalab Coding Set / Matatalab Pro Set (please make sure that the product is updated to the latest version and is fully charged)
2.3 Materials
Read the "Materials" section to understand the consumable materials to be used in a lesson and prepare them accordingly. Please also refer to the "Teacher Materials" section at the end of each lesson to download, print and create materials in advance if necessary.
2.4 Classroom
It is important to ensure that the table or floor is clean and level, regardless of the method of instruction used. The map should be leveled to ensure the unobstructed movement of the robot.
3.1 Lesson Orientation
3.2 Lesson Content
3.3 Teacher Materials
3.4 Appendices: Curriculum Framework
Each lesson in the Learning Station Curriculum is set to be 20 minutes in length and the chapters are consistently structured into the following parts.
3.1 Lesson Orientation
Overview: This section provides an introduction to the general content and implications of a lesson. If necessary, please read these sections in advance to understand the general logic of the book.
Essential Objectives: This section presents the basic objectives of each course chapter around which all lessons within that chapter are built. Teachers should be careful not to deviate from the objectives when teaching.
Learning Objectives: This section sets out the learning objectives that students should be able to achieve or demonstrate at the end of the course. Teachers can accordingly turn these specific requirements into classroom tasks.
Standards: This section captures the course standards to which the chapter refers and the specific entries that correspond to them.
Time: Indicates the duration of reference for the implementation of the course.
Materials: This section describes all the equipment and materials needed to implement the chapter‘s curriculum. It is worth noting that the prescribed materials are usually shared by four students. In line with the "Cooperative Learning, Exploratory Learning" concept, our course activities are usually designed to be conducted in groups of four. However, you can make adjustments to suit your needs when actually conducting the course.
Teacher Set-Up &Preparation: This section suggests teacher preparation activities for each class. Underneath the basic recommendations, there are correspondingly marked paragraphs describing the preparation activities that teachers need to do in a particular chapter.
Student Management: Recommendations for class management based on the content of the chapter.
Vocabulary: New vocabulary that will appear in the chapter, and explanations of the vocabulary.
3.2 Lesson Content:
Lessons: There are a total of 12 lessons in this book, divided into four chapters. Each chapter forms a system of its own, following a step-by-step process of introduction, understanding, and application.
First Chapter: The first chapter, for example, is divided into four lessons with the goal of teaching basic programming applications for Matatalab products. Specifically, the first lesson focuses on vocabulary understanding; the second lesson explains the process of programming - sending and receiving commands; the third lesson introduces the names and usage of specific coding blocks; and the final lesson is about applications, where students will practice hands-on programming using Matatalab products.
First Three Chapters: The first three lessons are mainly broken down into an introductory section and a student discussion section, setting out the orientation to learning and concepts, and the discussion topics (hands-on tasks), respectively.
Final Lesson: In contrast, the final lesson is split into more sections:
Activity: Students begin exploring programming in groups;
Students Discuss - Create – Share: Students discuss and share ideas based on the programming practices just presented;
Closing: The teacher wraps up the lesson and raises questions to elicit reflection from students and bolster the knowledge gained;
Extensions: Suggestions for extension tasks for uplifting abilities;
Real-World Connections: Targeting knowledge extension and transfer, this section is designed to help students connect what they have learned to the real world.
3.3 Teacher Materials:
The paper materials students will use are attached to this final section. Teachers can download and print out or cut out some of them, such as flashcards, worksheets, before teaching.
3.4 Appendices: Curriculum Framework
Please use the link below to download the Matatalab Learning Station Curriculum Framework:
Matatalab Learning Station Curriculum Framework(Click to download)
4.1 Group Learning:
The most common form of cooperative learning in a Matatalab classroom involves four students working as a group to operate a set of MatataBot. On this basis, the teacher could assign roles to the group members to ensure their engagement. The roles we propose are usually Programmer and Inspector, with the Programmer carrying out the programming and the latter assisting and monitoring the former. A group of 4 is a relatively ideal set-up, which ensures that students can work in pairs and engage in peer learning. There is, of course, flexibility for the teacher to ration based on factors such as the number of students.
4.2 Exploratory Learning:
A Matatalab lesson will usually set aside a sufficient amount of time for students to explore. When students don't feel like they have a clue, teachers can use examples to stimulate children's imaginations and demonstrate possibilities. Teachers can also spark students' thinking by asking questions as they go through the process.

1. Lesson Objectives: Know what is included in this curriculum, understand how to apply this curriculum in the classroom.
2. Time: 25 mins
3. Language: English
4. Format: Completely Online
5. Level: Intermediate
1. Introduction
2. Preparation
3. User Guide
4. Teaching Advice
The Extracurricular has 2 main parts: Teacher Guide and 12 lessons. Teacher Guide can help them understand how to use Matatalab Coding/Pro Set, how to apply it in their classrooms, and the aligned standards. Teachers can use these 12 lessons to help students learn how to use Matatalab Coding/ Pro Set and develop their computational thinking and 21st-century skills.
Artist Add-On and Musician Add-On Set Curriculum are divided into 2 main parts: Overview and Introduction and 12 lessons. The Overview and Introduction help teachers understand how to use Artist Add-On and Musician Add-On with Matatalab Coding Set, how to apply them in classrooms, and the aligned standards. The 12 lessons help teachers achieve cross-curricular teaching by using Matatalab and thus developing students' computational thinking and 21st-century skills.
In this lesson, teachers will learn how to make preparation if they wish to use these curriculums in their classrooms; how to use these curriculums when teaching, and some teaching advice.
2.1 Content
Read Teacher Guide and Overview and Introduction to familiarize yourself with the content of a lesson.
2.2 Product
For this curriculum, you can use Matatalab Coding Set / Matatalab Pro Set, Artist Add-On Set, Musician Add-On Set (please make sure that the product is updated to the latest version and is fully charged)
2.3 Materials
Read the "Materials" section to understand the consumable materials to be used in a lesson and prepare them accordingly. Please also refer to the "Teacher Materials" section at the end of each lesson to download, print and create materials in advance if necessary.
2.4 Classroom
It is important to ensure that the table or floor is clean and level, regardless of the method of instruction used. The map should be leveled to ensure the unobstructed movement of the robot.
3.1 Lesson Orientation
3.2 Lesson Content
3.3 Teacher Materials
3.4 Appendices: Curriculum Framework
Each lesson in these three curriculums is set to be 60 minutes in length and has the same structure.
3.1 Lesson Orientation
Overview: This section provides an introduction to the general content and implications of a lesson. If necessary, please read these sections in advance to understand the general logic of the book.
Essential Objectives: This section presents the basic objectives of each course chapter around which all lessons within that chapter are built. Teachers should be careful not to deviate from the objectives when teaching.
Learning Objectives: This section sets out the learning objectives that students should be able to achieve or demonstrate at the end of the course. Teachers can accordingly turn these specific requirements into classroom tasks.
Standards: This section captures the course standards to which the chapter refers and the specific entries that correspond to them.
Time: Indicates the duration of reference for the implementation of the course.
Materials: This section describes all the equipment and materials needed to implement the chapter‘s curriculum. It is worth noting that the prescribed materials are usually shared by four students. In line with the "Cooperative Learning, Exploratory Learning" concept, our course activities are usually designed to be conducted in groups of four. However, you can make adjustments to suit your needs when actually conducting the course.
Teacher Set-Up &Preparation: This section suggests teacher preparation activities for each class. Underneath the basic recommendations, there are correspondingly marked paragraphs describing the preparation activities that teachers need to do in a particular chapter.
Student Management: Recommendations for class management based on the content of the chapter.
Vocabulary: New vocabulary that will appear in the chapter, and explanations of the vocabulary.
3.2 Lesson Content:
Lessons: Each curriculum has 12 lessons, and the lesson content is advanced in accordance with the logical difficulty of introduction, understanding, and application.
Lesson Structure: A consistent curriculum structure ensures a progressive increase in knowledge and application difficulty. Take the first lesson of Extracurricular Curriculum as an example:
3.3 Teacher Materials:
The paper materials students will use are attached to this final section. Teachers can download and print out or cut out some of them, such as flashcards, worksheets, before teaching.
3.4 Appendices: Curriculum Framework:
Please use the link below to download the Matatalab Extracurricular Curriculum Framework:
Matatalab Extracurricular Curriculum(Click to download)
Please use the link below to download the Matatalab Artist Add-On Curriculum Framework:
Matatalab Artist Add-On Curriculum(Click to download)
Please use the link below to download the Matatalab Musician Add-On Curriculum Framework:
Matatalab Musician Add-On Curriculum Framework:(Click to download)
4.1 Cooperative Learning:
The most common form of cooperative learning in a Matatalab classroom involves four students working as a group to operate a set of MatataBot. On this basis, the teacher could assign roles to the group members to ensure their engagement. The roles we propose are usually Programmer and Inspector, with the Programmer carrying out the programming and the latter assisting and monitoring the former. A group of 4 is a relatively ideal set-up, which ensures that students can work in pairs and engage in peer learning. There is, of course, flexibility for the teacher to ration based on factors such as the number of students.
4.2 Exploratory Learning:
A Matatalab lesson will usually set aside a sufficient amount of time for students to explore. When students don't feel like they have a clue, teachers can use examples to stimulate children's imaginations and demonstrate possibilities. Teachers can also spark students' thinking by asking questions as they go through the process.

1. Lesson Objectives: Know what is Activity in Matatalab, understand the template of the Activity, Understand the sample of Matatalab Activity, understand how to use Matatalab Activity Creator Tool, understand how to create your own activities.
2. Time: 25 mins
3. Language: English
4. Format: Completely Online
5. Level: Advanced
1. Introduction
2. Matatalab Certified Educator (MCE)
3. How to Create Your Own Activity
4. Matatalab Activity Cards Sample: Travel in the Universe
Matatalab Edu provides rich activities in addition to curriculums. Educators can find the activities they desire to teach according to the content category: such as maths-related activities, music, and arts-related activities, ELA related activities, social study-related activities, competitive activities, PBL activities, etc. More accurate activities based on students’ age and products could also be found.
For the past two years, Matatalab has collected lots of feedback from educators around the world. Several outstanding educators shared their excellent classroom activities or lessons using Matatalab products on our social media. This has made us think about how to create a communication platform for enthusiastic and experienced educators. The Matatalab Edu Activity Website has been developed as a result. Through this platform, educators do not only find some classroom activities created by Matatalab Edu but also create and share more and more interesting classroom activities based on their own experience using Matatalab products. We firmly believe that fantastic classroom activities must come from educators who use Matatalab products in their classrooms.
After going through several existing activities, educators may have an idea on how to create a qualified Matatalab activity.
To help educators get to know Matatalab better, we provide three self-guided courses: Matatalab Edu Lite Course, Matatalab Edu Coding/Pro Set Course, and Matatalab Edu Coding Advanced Course. A corresponding certificate will be awarded at the end of each course.
Once the educator completes one of the three courses and gets one Course Certificate, they will move to the second level: create their own activities.Once the educator provides 6 qualified activities per year, Matatalab will award the coressponding title of Matatalab Certified Educator to him/her.
The educator who completes the Lite course shall provide 6 activities based on Matatalab Lite.
The educator who completes the Coding/Pro Set Course shall provide 6 activities based on Matatalab Coding/Pro Set.
The educator who completes the Coding Advanced Course shall provide 6 activities based either on Animation Add-on or Sensor Add-on.
All the MCE will be placed in Matatalab Edu talent pool. Matatalab Edu hopes to have further cooperation with the MCE. The MCE will benefit in several ways:
1. Award of the MCE Certificate and T-shirt worth 30 USD.
2. Matatalab will select excellent created activities by the MCE, and assemble them into books. The MCE as the contributor, his/her name will appear in the published book.
3. When Matatalab launches its latest products, such as new maps and activity packages, the MCE can apply for and stand the chance to get them for free.
4. Matatalab participates in educational exhibitions all around the world every year. Such as the ISTE (the U.S.), BETT (the U.K.), FETC (the U.S.), MIEF(Russia), STEM EXPO (Japan), etc. On these occasions, Matatalab invites the MCE to either host a workshop or a presentation.
5. Matatalab will select outstanding MCE in each country and region as our guests or partners to take part in the Virtual Training or On-Side Workshop.
All interpretation rights reserved for Matatalab.
3.1 Activity Template
Before creating a Matatalab Edu activity, please take a look at our activity/lesson template. The template can be downloaded from: Matatalab Activity
In a template, these parts are included:
3.1.1 Classroom Key Information
3.1.2 Activity/Lesson Key Information
3.1.3 Matatalab Products and Supplementary Materials
3.1.4 Detailed Activity Plan
3.1.5 Essential Questions
3.1.6 Supporting Files.
3.1.1 Classroom Key Information:
3.1.2 Activity/Lesson Key Information:
3.1.3 Matatalab Products and Supplementary Materials:
3.1.4 Detailed Activity/Lesson Plan:
Note: If you are struggling using the Matatalab Edu classic activity plan template, other lessons/template formats are also acceptable. However, please write the instructions step by step. These steps should be clear, concise, and easily understood by other teachers who prepare the activity for their class.
Teacher’s notes are encouraged to be added to the activity plan.
3.1.5 Essential Questions:
List the questions that students may ask and that need to be figured out in the activity.
3.1.6 Supporting Files:
Are there any other materials you can share with other educators? Some great supporting files include:
3.2 Matatalab Creator Tool:
After using the template to create your own activities, you can use our Matatalab Creator Tool system to submit your activities to us.
1. Lesson Objectives: Pass the quiz to receive the Matatalab Edu Coding/Pro Set Course Certificate
2. Time: 20 mins
3. Language: English
4. Format: Completely Online
5. Level: Advanced
1. Final Quiz
Please the use window below to finish the final quiz. If your grade is equal or higher than 8 points, you will receive the certificate by email. Please enter the correct email address so that we can send you the certificate. The whole quiz could be around 20 minutes.


Course 3: Matatalab Advanced Coding Course helps educators learn how to use Matatalab Sensor Add-On and Animation Add-On packeage. If educators want to learn this course, there are some prerequisites: Matatalab Coding/Pro Set Course (or used Matatalab Coding/Pro Set before). Curriculums provided in this course will cover all of these packages and educators can learn how to apply them in classroom. Additionally, educators can also learn how to use activities provided online and even create their own. In the final lesson, educators will need to finish a final quizto get the certificate of finishing this course. Details will be provided in the lessons' page. You can use the lessons list below or the menu left to navigate to the lessons:

1. Lesson Objectives: Know what is included in Matatalab Animation Add-On package, understand how to make MatataBot make a continuous movement, understand how to stop MatataBot's moving, understand how to make MatataBot draw a circle and make a U-turn.
2. Time: 25 mins
3. Language: English
4. Format: Completely Online
5. Level: Advanced
6. Prerequisites: Matatalab Coding/Pro Set Course (or used Matatalab Coding Set before).
1. Introduction
2. What's Included
3. Get Started Quickly
4. User Guide
5. Q&A
The Animation Add-on takes advantage of MatataBot's Go-Draw feature, enable kids to program the robot to draw amazing shapes and move in unique ways. They can also customize the Matabot’s eyes with different colors and make funny sounds! Finally, kids can now animate the MatataBot how they like through hands-on play! Animation Add- On cannot be used individually, Matatalab Coding/Pro Set is required.
In Matatalab Lite, these are included:
2.1 Coding Blocks
2.2 Animation Add-On Blocks Introduction
2.3 Challenge Booklet
2.4 Important Notice Card

How to Pair:
Use the Matatalab Animation Add-On package, you only need 1 step to finish the pairing.
The step is to pair MatataBot and Command Tower. Press Power Button for 2 seconds to pair Command Tower and MatataBot when they pair successfully, there will be a "Ding" tone, both indicator lights will turn blue and stay on.
4.1 Continuous Movement:
The biggest difference between Animation Add-On coding blocks and Motion coding blocks in the Coding/Pro Set is that the Set Speed of Wheel coding blocks in Animation Add-On will let MatataBot make a continuous movement, but motion coding blocks can only let make MatataBot make one movement at a time.
Use Set Speed of Left Wheel to Move Forward and Set Speed of Right Wheel to Move Forward in a pair together can make MatataBot keep moving forward, and use Set Speed of Left Wheel to Move Backward and Set Speed of Right Wheel to Move Backward in a pair together can make MatataBot keep moving backward. Please use the examples below to see the difference between Animation coding blocks and Motion coding blocks.
Animation Coding Blocks:
Motion Coding Blocks:
4.2 Stop MatataBot:
Only using Set Speed of Left Wheel to Move Forward, Set Speed of Right Wheel to Move Forward, Set Speed of Left Wheel to Move Backward, and Set Speed of Right Wheel to Move Backward coding blocks, MatataBot will not stop. If we only want MatataBot to move a distance, Wait coding blocks, Stop the Left Wheel coding blocks, and Stop Right Wheel coding blocks are required.
Wait coding blocks can pause the command for a specified amount of time, default for around 1 sec, put Number coding blocks beneath to change the pause time. Stop the Left Wheel coding blocks, and Stop Right Wheel coding blocks can make MatataBot stop its left wheel and right wheel separately.
Please use the examples below to see the effect of using these coding blocks:
4.3 Speed Change
When used with Number coding blocks with Set Speed of Left Wheel/Right Wheel coding blocks can change the speed of the left wheel and right wheel separately. For example, when using Number 3 coding blocks with Set Speed of Left Wheel/Right Wheel coding blocks, it can increase the speed of the left wheel and right wheel to 3.
4.4 Drawing Circles/U-Turn
When used different Number coding blocks with Set Speed of Left Wheel/Right Wheel coding blocks separately can let MatataBot's left wheel and right wheel have different speeds. In this case, MatataBot can draw circles and make a U-turn. Additionally, when one of the wheels is stopped, another wheel is moving, it can also let MatataBot draw a circle and make a U-turn.
Examples provided below:
4.5 Left/Right LED Color Coding Blocks:
In Matatalab Animation Add-On package, there is also a kind of coding block to make MatataBot's eyes display different colors to make students enjoy the fun of learning with Matatalab.
Shuffle the Left/Right LED Color coding blocks to color black to turn off the eye lights. An example provided below:
Note: Use Left/Right LED Color coding blocks with Number coding blocks can change the brightness of the LED lights.

1. Lesson Objectives: Know what is included in Matatalab Sensor Add-On package, understand the coding blocks included, especially Wait Until coding blocks, understand how to use them with other coding blocks.
2. Time: 30 mins
3. Language: English
4. Format: Completely Online
5. Level: Advanced
6. Prerequisites: Matatalab Coding/Pro Set Course (or used Matatalab Coding Set before).
1. Introduction
2. What's Included
3. Get Started Quickly
4. Coding Blocks
5. Q&A
The Sensor Add-on enhances the coding adventure, enable kids to program the MatataBot to detect and react to obstacles, colors, and even sound. Kids can also control the onboard LED lights embedded into the Matatalab Controller to customize their code to their imagination. Sensor Add-On package cannot be used individually, other Matatalab Products need to be combined, such as Matatalab Coding/Pro set, Matatalab Animation Add-On package.
In Matatalab Lite, these are included:
2.1 Coding Blocks
2.2 Color Cards
2.3 User Guide
2.4 Challenge Booklet
2.5 USB-C Cable

3.1 Sensor Mode:
For Matatalab Controller, there are three modes: Control Mode; Coding Mode; Sensor Mode. When using Matatalab Sensor Add-On package, switch the controller to Sensor Mode.
3.2 How to Pair:
Use Matatalab Sensor Add-On package, you need 2 steps to finish the pairing.
Step 1: The first step is to pair MatataBot and Controller. Press Power Button for 2 seconds to pair controller and MatataBot, when they pair successfully, there will be a "Ding" tone, both indicator lights will turn blue and stay on.
Step 2: After finishing the pairing of MatatatBot and Controller, the second step is to pair the Command Tower and Controller. If the Controller is not paired with the Command Tower successfully, the indicator of the controller will keep flashing red.
⚠️ If it is the first time to pair Controller with Command Tower, you need to double-click the power button of the Command Tower to pair the Command Tower with the Controller.
After the pairing is completed, the indicator lights of the Controller and Command Tower will stay blue.
4.1 Wait Until Coding Blocks:
In Matatalab Sensor Add-On Package, Wait Until coding blocks is one of the most important coding blocks. It has two notches, so it can only be attached with the small coding blocks in Sensor Add-On package, Number coding blocks and Angle coding blocks cannot be attached. Using Wait Until coding blocks means that MatataBot will remain the original state until the sensor on MatataBot detects the corresponding conditions before running the next command.

4.2 Bright & Dark Coding Blocks:
In Matatalab Sensor Add-On package, there are two kinds coding blocks to make MatataBot detect the change the light brightness: Bright coding blocks and Dark coding blocks. When attached with Wait until coding blocks, they can make MatataBot detect the change of light brightness and execute the next commands.
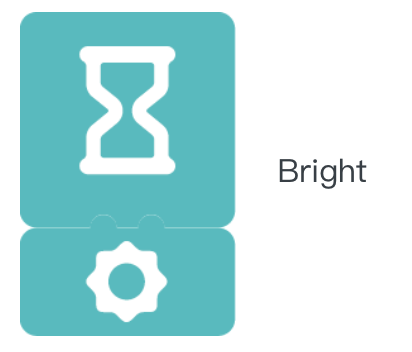
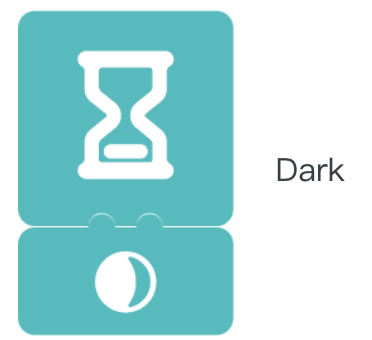
Examples provided below:
4.2 Obstacle & No Obstacle Coding Blocks:
In Matatalab Sensor Add-On package, there are two kinds coding blocks to make MatataBot detect the obstacles: Obstacle coding blocks and No Obstacle coding blocks. When attached with Wait until coding blocks, they can make MatataBot detect the obstacles and execute the next commands.
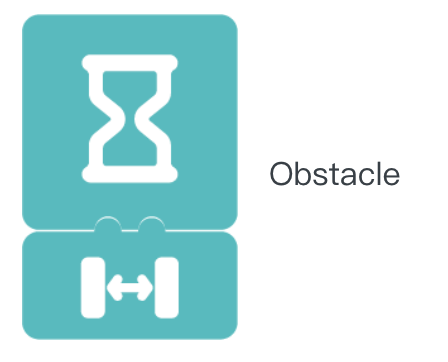
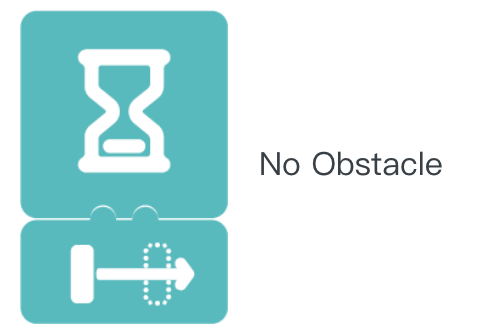
Example provided below:
4.3 Red/Green/Yellow Coding Blocks:
In Matatalab Sensor Add-On package, there are three kinds of coding blocks that can make MatataBot detect the color: Red coding blocks, Green Obstacle coding blocks, and Yellow Coding Blocks. When attached with Wait until coding blocks, they can make MatataBot detect the color and execute the next commands.
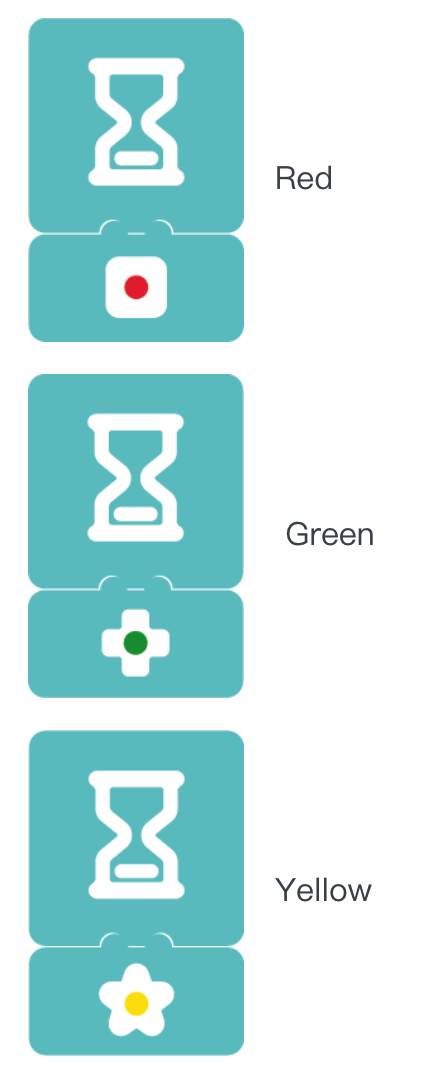
Example provided below:
4.4 Hear Sound Coding Blocks:
In Matatalab Sensor Add-On package, there is one kind of coding block that can make MatataBot detect the sound around: Hear Sound coding blocks. When attached with Wait until coding blocks, they can make MatataBot execute the next commands when it hear a sound.
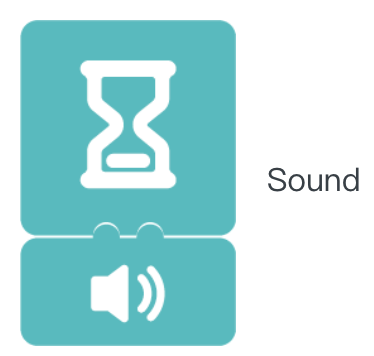
Example provided below:
4.5 Shake Coding Blocks:
In Matatalab Sensor Add-On package, there is one kind of coding block that can make MatataBot detect the controller shake: Shake coding blocks. When attached with Wait until coding blocks, they can make MatataBot execute the next commands when controller is shaken.
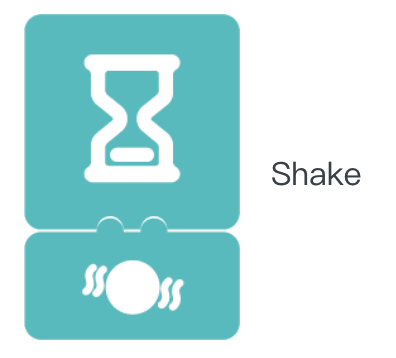
Example provided below:
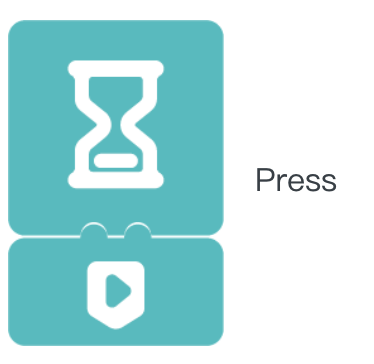
4.6 Press Coding Blocks:
In Matatalab Sensor Add-On package, there is one kind of coding block that can make MatataBot detect the Play Button press on the controller: Press coding blocks. When attached with Wait until coding blocks, they can make MatataBot execute the next commands when the Play Button on the controller is pressed.
Example provided below:
4.7 Send a Signal/Receive a Signal Coding Blocks:
In Matatalab Sensor Add-On package, there is one kind of coding block to make MatataBot send and receive signal: Send a Signal coding blocks, Receive a Signal coding blocks. They can be used individually or used with other coding blocks. Send a Signal coding blocks can make MatataBot attached with a controller send a signal, when another MatataBot attached with a controller is in the signal range and using Receive a Signal coding blocks, it will receive the signal and execute the next commands.
Note: When MatataBot A sends a signal to MatataBot B, MatataBot B can only receive the signal if the Play button on its programming board has been pressed beforehand.

Example provided below:

4.8 All Light Color/Clockwise Light Color/Counterclockwise Light Color Coding Blocks:
In Matatalab Sensor Add-On package, there is one kind of coding block to let the controller display different color of lights: All Light Color coding blocks, Clockwise Light Color coding blocks, Counterclockwise Light Color coding blocks. All Light Color coding blocks can let the controller display a circle of same color lights. Clockwise Light Color coding blocks and Counterclockwise Light Color coding blocks can let the controller display the lights in clockwise or counterclockwise.
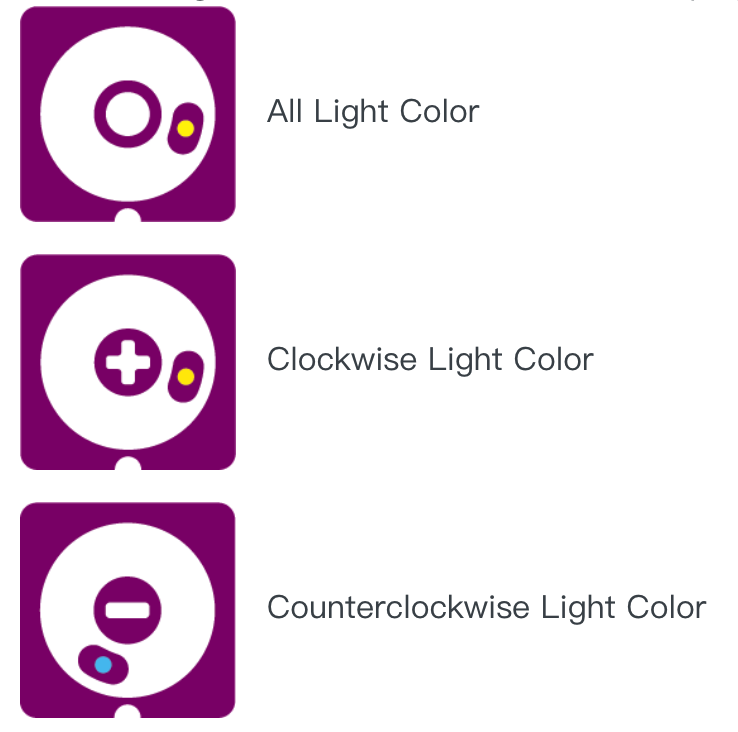
If you want to turn off the lights, you need to shuffle the All Light Color coding blocks to the color black:

Example provided below:

1. Lesson Objectives: Know what is included in these two curricular, understand how to apply these two curricular in classroom.
2. Time: 25 mins
3. Language: English
4. Format: Completely Online
5. Level: Advanced
1. Introduction
2. Preparation
3. Curriculum Implementation
4. Curriculum Framework
5. Teaching Advice
Don’t know where to start? Start here! The Teacher Guide for Matatalab’s Animation Add-on and Sensor Add-on have sixteen engaging lessons for each for you to do with your students. Written by expert K-8 robotics educators, these lessons are sure to engage and inspire as you Code to animate and the next level of coding.
2.1 Teacher Guide:
Before each class starts, please refer to the Teacher Guide for information on the practical aspects of the lesson and learn to apply the product features covered in the lesson.
2.2 Product:
The products used for these two curricular are:
2.3 Content:
Read the Teacher Guide to familiarize yourself with Matatalab Sensor Add-on, Matatalab Animation Add-on, coding blocks, and their usage.
2.4 Materials:
Please follow the 'What You’ll Need' section to prepare the materials for this lesson. Download, print, and produce material in advance if necessary.
After that, please do not forget to charge MatataBot and the controller following the charging instructions. Be sure to keep MatataBot, Command Tower, and other main devices updated to the latest version.

2.5 Classroom:
It is important to ensure that the table or floor is clean and level, regardless of the method of instruction used. The map should be leveled to ensure the unobstructed movement of the robot.
Please take a look at how the lesson plan is broken down:
Detailed curriculum frameworks are provided to help you the main content and goals of every lesson.
Please use the link below to download the Matatalab Sensor Add-On curriculum framework:
Matatalab Sensor Add-On curriculum framework (Click to Download)
Please use the link below to download the Matatalab Animation Add-On curriculum framework:
Matatalab Animation Add-On curriculum framework (Click to Download)
1. Please read the 'What You’ll Do' section before each lesson to understand what is covered in that lesson.
2. Given the students’young age, the goals can be appropriately adjusted to build self-confidence when they fail to meet them.
3. Get students to develop good habits during classes. Example: ask students to care for the robots, switch the machines on and off themselves, and help the teacher organize the teaching aids at the end of the lesson.

1. Lesson Objectives: Know what is Activity in Matatalab, understand the template of the Activity, Understand the sample of Matatalab Activity, understand how to use Matatalab Activity Creator Tool, understand how to create your own activities.
2. Time: 25 mins
3. Language: English
4. Format: Completely Online
5. Level: Advanced
1. Introduction
2. Matatalab Certified Educator (MCE)
3. How to Create Your Own Activity
4. Matatalab Activity Cards Sample: Travel in the Universe
Matatalab Edu provides rich activities in addition to curriculums. Educators can find the activities they desire to teach according to the content category: such as maths-related activities, music, and arts-related activities, ELA related activities, social study-related activities, competitive activities, PBL activities, etc. More accurate activities based on students’ age and products could also be found.
For the past two years, Matatalab has collected lots of feedback from educators around the world. Several outstanding educators shared their excellent classroom activities or lessons using Matatalab products on our social media. This has made us think about how to create a communication platform for enthusiastic and experienced educators. The Matatalab Edu Activity Website has been developed as a result. Through this platform, educators do not only find some classroom activities created by Matatalab Edu but also create and share more and more interesting classroom activities based on their own experience using Matatalab products. We firmly believe that fantastic classroom activities must come from educators who use Matatalab products in their classrooms.
After going through several existing activities, educators may have an idea on how to create a qualified Matatalab activity.
To help educators get to know Matatalab better, we provide three self-guided courses: Matatalab Edu Lite Course, Matatalab Edu Coding/Pro Set Course, and Matatalab Edu Coding Advanced Course. A corresponding certificate will be awarded at the end of each course.
Once the educator completes one of the three courses and gets one Course Certificate, they will move to the second level: create their own activities.Once the educator provides 6 qualified activities per year, Matatalab will award the coressponding title of Matatalab Certified Educator to him/her.
The educator who completes the Lite course shall provide 6 activities based on Matatalab Lite.
The educator who completes the Coding/Pro Set Course shall provide 6 activities based on Matatalab Coding/Pro Set.
The educator who completes the Coding Advanced Course shall provide 6 activities based either on Animation Add-on or Sensor Add-on.
All the MCE will be placed in Matatalab Edu talent pool. Matatalab Edu hopes to have further cooperation with the MCE. The MCE will benefit in several ways:
1. Award of the MCE Certificate and T-shirt worth 30 USD.
2. Matatalab will select excellent created activities by the MCE, and assemble them into books. The MCE as the contributor, his/her name will appear in the published book.
3. When Matatalab launches its latest products, such as new maps and activity packages, the MCE can apply for and stand the chance to get them for free.
4. Matatalab participates in educational exhibitions all around the world every year. Such as the ISTE (the U.S.), BETT (the U.K.), FETC (the U.S.), MIEF(Russia), STEM EXPO (Japan), etc. On these occasions, Matatalab invites the MCE to either host a workshop or a presentation.
5. Matatalab will select outstanding MCE in each country and region as our guests or partners to take part in the Virtual Training or On-Side Workshop.
All interpretation rights reserved for Matatalab.
3.1 Activity Template
Before creating a Matatalab Edu activity, please take a look at our activity/lesson template. The template can be downloaded from: Matatalab Activity
In a template, these parts are included:
3.1.1 Classroom Key Information
3.1.2 Activity/Lesson Key Information
3.1.3 Matatalab Products and Supplementary Materials
3.1.4 Detailed Activity Plan
3.1.5 Essential Questions
3.1.6 Supporting Files.
3.1.1 Classroom Key Information:
3.1.2 Activity/Lesson Key Information:
3.1.3 Matatalab Products and Supplementary Materials:
3.1.4 Detailed Activity/Lesson Plan:
Note: If you are struggling using the Matatalab Edu classic activity plan template, other lessons/template formats are also acceptable. However, please write the instructions step by step. These steps should be clear, concise, and easily understood by other teachers who prepare the activity for their class.
Teacher’s notes are encouraged to be added to the activity plan.
3.1.5 Essential Questions:
List the questions that students may ask and that need to be figured out in the activity.
3.1.6 Supporting Files:
Are there any other materials you can share with other educators? Some great supporting files include:
3.2 Matatalab Creator Tool:
After using the template to create your own activities, you can use our Matatalab Creator Tool system to submit your activities to us.
1. Lesson Objectives: Pass the quiz to receive the Matatalab Advanced Coding Course Certificate
2. Time: 25 mins
3. Language: English
4. Format: Completely Online
5. Level: Advanced
Final Quiz
Please the use window below to finish the final quiz. If your grade is equal or higher than 12 points, you will receive the certificate by email. Please enter the correct email address so that we can send you the certificate. The whole quiz could be around 25 minutes.

This course helps educators learn how to use Tale-Bot Pro-Kit and apply its related curriculum, Activity Cards for Tale-Bot Pro in their own classroom. Additionally, educators can also learn how to create their own activities. In the final lesson, educators will need to finish a final quiz to get the certificate of finishing this course. Details will be provided on the lessons page.

1. Lesson Objectives: Get to Know what is the meaning of coding education in Children’s early age.
2. Time: 10 mins
3. Language: English
4. Format: Completely Online
5. Level: Beginner
1. The Education Purposes
2. What’s Computational Thinking?
3. Matatalab Coding Education for studnets age 3-5
It’s not about programming skills.
It’s about Technological Confidence.
It’s about Computational Thinking via games.
Learn to code, and code to learn! Just like, Learn to read, and learn more knowledge with reading skills!

In education, computational thinking (CT) is a set of problem-solving methods that involve expressing problems and their solutions in ways that a computer could also execute. There are 4 key concepts of Computational Thinking:
Decomposition, Pattern Recognition, Abstraction, and Algorithm.


1. Lesson Objectives: Get to know the structure of Tale-Bot Pro. Control how to use the different command buttons in Tale-Bot Pro Robot.
2. Time: 30 mins
3. Language: English
4. Format: Completely Online
5. Level: Beginner
1. Introduction
2. The 4 Features of Tale-Bot Pro Robot
3. What’s included
4. The Structure of Tale-Bot Pro Robot
5. How to Use the Command Buttons
6. Accessories
7. Q&A
Tale-Bot Pro interactive hands-on coding robot is an entry-level learning robot for kids aged 3-5. Leveled up with innovative technology and with a wide range of cross-curricular Interactive maps, kids can learn basic coding concepts, and manipulate a robot to develop stories in a smart manner. Through game-based play, kids can improve skills of free speaking, and storytelling, while their social-emotional skills, four C’s of 21st century skills, and computational thinking are exercised.
")

2.1 Age-appropriate design
Easy and simple, meet the cognitive development of 3-5 years old.

2.2 Smart interactive technology
1.Instructive voice guidance. To help teachers to build up a better learning environment for young kids and encourage them to create their own stories or games.

2. Erro warning and success celebration. Support effective and timely voice feedback. Kids become more engaged and can easily do debugging. The whole process is carefree and kids are encouraged to keep on trying and are not afraid of failure. When they succeed, the robot will sing and dance with them.

3. Game-based. With a wide range of cross-curricular Interactive maps and Stickers, teachers can easily integrate coding into different classes.
2.3 Innovative and fun record function.
Support kids to creatively tell their own stories which are personalized and full of fun. And to foster creativity, free speaking, and storytelling.

2.4 Repeat function.
Teaches pattern recognition and abstraction with simple play.

In Tale-Bot Pro Robot Box, these are included:
1. Tale-Bot Pro x 1
2. Wing x 2
3. Arm assembly x 2
4. Drawing & building blocks bracket x 2
5. User guide x 1
6. Washable marker x 2

4.1 The indicators:
There are 8 coding indicators and 4 repeat indicators. The color of the indicator lights matches the input command buttons' color.
")
4.2 The command buttons:
There are 9 command buttons.

5.1 There 4 basic movement command buttons:
Move Forward, Move backward, Left Turn, and Right Turn.
Task: Try to use these basic movement buttons to code, and finish the task below.

5.2 Clear Button:
")
5.3 Random Dance Button:
")
5.4 Record button:
there are two main ways to apply the recording function.
1. Press the recording button and speak to enter the recording state; At the end of the speech, release the recording button to end the recording state. Once the recording is complete, the robot plays the audio file for the user to double-check. Note that each recording is limited to 30 seconds.
2. If you want to directly use the latest recorded audio file, just press the recording command button (<1 second) to reuse.
Task1: Program Tale-Bot to reach the toy, and greet the toy with the Record button.
")
Task2: Program Tale-Bot to reach both the carrots. Each time Tale-Bot reach one carrot,it will say “I like to eat the carrot”.
")
5.5 Repeat Button:
To set how many times the execution of inputted commands is repeated.
Task1: Observe how the robot moves when it is started in the following four situations respectively.
")
Task2: Repeat the Forward command infinitely

Question: How to Repeat the Forward command infinitely?
Task3: Program Tale-Bot to dance on the parade!


6.1 Wing x 2:
The two wings give Tale-Bot a new look.

6.2 Arm assembly x 2 :
The arm assembly can be used to help Tale-Bot hold and move 3D objects, such as a little box or a toy.

6.3 Drawing & building blocks bracket x 2:
6.3.1
The building block can be used with a big pellet Lego. Students are encouraged to create more looks or extend more functions.

6.3.2
The drawing block can be used to hold colorpens. Then, we can program to Tale-Bot to draw interesting shapes.


Q1: How to enter an interactive map?
A1: Place Tale-Bot on the Main Enterance.
Q2: Do I need exit interactive map mode?
A2: Yes. There are 2 situations that you may need to exit interactive maps. One, When you want to use the interactive maps as normal maps. Two, when you want to program Tale-Bot and run it on the black maps or on the floor.
Q3:How to exit an interactive map?
A3: Simply turn off the robot to exit the interactive map.
")
Q4: Could I use the repeat button to simplyfied a programs that only part of the commands are repeated?
A4: No! The repeat function can only be used if one program including several same command units.
")

1. Lesson Objectives: Get to know the Activity Box. Especially, understand how to use the interactive maps or stickers.
2. Time: 30 mins
3. Language: English
4. Format: Completely Online
5. Level: Beginner
1. What’s included
2. Interactive maps
3. Blank Map
4. Sticker Booklet
5. Command Cards
6. Important Use Tips
In Activity Box, these are included:
1. Command card x 32
2. Double-sided interactive maps x 5
3. Configuration setting card x 1
4. Double-sided blank map x 1
5. Callout stickers x 1
6. Sticker booklet x 1
7. Callout stickers quick guide x 1
8. Paper craft x 3
There are 5 double-sided interactive maps, including rich scenes which are in line with the perception and interests of 3-5 years old children. They lead the children to learn interdisciplinary knowledge while learning to program.
2.1 The features of interactive maps:

2.2 How to use the interactive maps?

2.3 Detailed information on the interactive maps.


There is 1 double-sided blank map. It provides an open playground. Children can place objects, cards, interactive stickers, and other small things on the Blank map, that they can independently create interesting and rich programming scenarios.

The Sticker booklet includes a total of 10 themes of interactive stickers and a set of function stickers, a total of 79 interactive stickers. The 10 themes are Supermarket, Profession, Saving the princess, Harvest, Solar system, Antonyms, Patrol car, Farm, Cars, and Treasure hunting. The Function stickers include signal stickers and trap stickers.

There are 32 pieces of Command cards.


1. To use the Interactive Maps, please place the robot at the main entrance on the upper left of the map first; after hearing the voice instruction, place the robot at any secondary entrance, and start coding according to the voice instructions.

2. When the Tale-Bot Pro is at the main entrance, secondary entrance, or the starting point, the voice instruction can be simply stopped and switched to the new voice instruction of the new place you put the robot.
3. When the Tale-Bot Pro is already moving on the map, you can only press the Play button to stop the voice instruction.
4. When the voice instruction is playing, pressing any button other than the Play button to stop the voice instructions is useless. You have to wait for the voice instruction to be finished, then you can press the buttons to program.--- This helps to improve the patience and sense of rules of the kids. If you really have to interrupt the voice of Tale-Bot Pro, you have to press the Play button to inform it
5. The Interactive Maps and interactive stickers are suggested to be used separately!

6. Once entering one themed Interactive Stickers, Tale-Bot Pro would not give any response to other themed Interactive Maps or Interactive Stickers. Thus, if you finish using one themed Interactive Map, and want to use the Interactive Stickers, please restart Tale-Bot Pro.

1. Lesson Objectives: Know the syllabus of Activity Cards for Tale-Bot Pro, and what is included in the Activity Cards, understand how to apply for the cards in the classroom.
2. Time: 20 mins
3. Language: English
4. Format: Completely Online
5. Level: Advanced
1. Introduction
2. Curriculum Principles
3. The Reference Standards
4. Programming Learning Models
5. Curriculum Features
6. Activity Category and Curriculum Framework
7. Preparation and Implementation
8. Teaching Advice
Activity Cards provide students with activity cases that are flexible and full of fun to inspire and encourage teachers to create more innovative courses based on these cases.
Aiming at the cognitive development in children aged 3-5, interdisciplinary themed coding activities are made to exercise students’ communication, collaboration, creativity, and critical thinking skills.
These activities are interesting and allow students to learn language expression, science, mathematics and social study, etc. while studying the fundamentals of programming.

Based on the “Learning and Development Guide for Children Aged 3-6 "and the “New York State Prekindergarten Foundation for the Common Core”, combining the three learning characteristics of 3-6 years old children: direct perception, practical, hands-on experience, to research and develop hands-on coding activities which are more suitable for young children, in order to arouse children's interest in programming, and to be prepared for the future life and study

Activity design is suitable for 3-5 years old children programming computational thinking learning model, in a relaxed and pleasant environment to cul_x0002_tivate children's computational thinking, promote children's skills of language, spatial, motor, social, and other aspects of intelligence development.


5.1 Scene:
Coherent game or story scenes to facilitate integration with pre-kindergarten-kindergarten teaching themes.

5.2 Cooperation:
A group of 2 people works together, emphasizing the improvement of cooperative learning ability, and training N+1 children with growth thinking.

5.3 Cross-Curricula:
In line with the cognitive development level of children aged 3-5, learn ELA, Math, Science, Art, etc. through fun programming activities.

5.4 Creation:
Low-structure materials, encourage independent creativity to design game tasks, playing is more important than the game itself.

6.1 Activity Category
There are 42 activities for you to do with your students in Activity Cards for Tale-Bot Pro booklet. The 42 activities could be treated as a systematic curriculum. Four categories were included in this curriculum: 10 basic instruction activities, 15 exploration activities, 7 pattern recognition activities, and 10 overall development activities.

6.2 Curriculum Framework
A detailed curriculum framework is provided to help you learn the main content of every activity. Please use the link below to download the curriculum framework and some sample activities.
Activity Cards for Tale-Bot Pro framework and sample activities (click to download)
7.1 Preparation:
Content: Read the Activity Cards to familiarize yourself with the content of a class activity. Product: For this curriculum, you need to use Tale-Bot Pro-Kit (including the Tale-Bot Pro robot and the Activity Box).
Materials:
Classroom: It is important to ensure that the table or floor is clean and level, regardless of the method of instruction used. The map should be leveled to ensure the unobstructed movement of the robot.
7.2 Implementation:
1. Please read the Quick Overview before each lesson to understand what is covered in that lesson.
2. Given the students’ young age, the goals can be appropriately adjusted to build self-confidence when they fail to meet them.
3. Get students to develop good habits during lessons. Example: ask students to care for the robots, switch the machines on and off themselves, and help the teacher organize the teaching aids at the end of the lesson.

1. Lesson Objectives: Know what is Activity in Matatalab, understand the template of the Activity, Understand the sample of Matatalab Activity, understand how to use Matatalab Activity Creator Tool, understand how to create your own activities.
2. Time: 20 mins
3. Language: English
4. Format: Completely Online
5. Level: Advanced
1. Matatalab Activity Introduction
2. Matatalab Certified Educator (MCE)
3. How to Create Your Own Activity
4. Matatalab Activity Cards Samples
Matatalab Edu provides rich activities in addition to curriculums. Educators can find the activities they desire to teach according to the content category: such as maths-related activities, music, and arts-related activities, ELA-related activities, social study-related activities, competitive activities, PBL activities, etc. More accurate activities based on students’ age and products could also be found.
For the past two years, Matatalab has collected lots of feedback from educators around the world. Several outstanding educators shared their excellent classroom activities or lessons using Matatalab products on our social media. This has made us think about how to create a communication platform for enthusiastic and experienced educators. The Matatalab Edu Activity Website has been developed as a result. Through this platform, educators do not only find some classroom activities created by Matatalab Edu but also create and share more and more interesting classroom activities based on their own experience using Matatalab products. We firmly believe that fantastic classroom activities must come from educators who use Matatalab products in their classrooms.
After going through several existing activities, educators may have an idea of how to create a qualified Matatalab activity.
To help educators get to know Matatalab better, we provide self-guided courses: Matatalab Edu Lite Course, Matatalab Edu Coding/Pro Set Course, Matatalab Edu Coding Advanced Course, and Tale-Bot Pro Course. A corresponding certificate will be awarded at the end of each course.

Once the educator completes one of the courses and gets the Course Certificate, they will move to the second level: creating their own activities. Once the educator provides 3 qualified activities per year or joins our pilot program, Matatalab will award the corresponding title of Matatalab Certified Educator to him/her. For more information, please check: Matatalab MCE (click to download)

All the MCE will be placed in Matatalab Edu talent pool. Matatalab Edu hopes to have further cooperation with the MCE. The MCE will benefit in several ways:
1. Award of the MCE Certificate and T-shirt worth 30 USD.
2. Matatalab will select excellent created activities by the MCE, and assemble them into books. The MCE as the contributor, his/her name will appear in the published book.
3. When Matatalab launches its latest products, such as new maps and activity packages, the MCE can apply for and stand the chance to get them for free.
4. Matatalab participates in educational exhibitions all around the world every year. Such as the ISTE (the U.S.), BETT (the U.K.), FETC (the U.S.), MIEF(Russia), STEM EXPO (Japan), etc. On these occasions, Matatalab invites the MCE to either host a workshop or a presentation.
5. Matatalab will select outstanding MCE in each country and region as our guests or partners to take part in the Virtual Training or On-Side Workshop. All interpretation rights are reserved for Matatalab.
Before creating a Matatalab Edu activity, please take a look at our activity/lesson template. The template can be found: Matatalab Teaching plan template
In a template, these parts are included:
3.1.1 Classroom Key Information
3.1.2 Activity/Lesson Key Information
3.1.3 Matatalab Products and Supplementary Materials
3.1.4 Detailed Activity Plan
3.1.5 Essential Questions
3.1.6 Supporting Files.

3.1 Classroom Key Information:
3.2 Key Activity Information:
3.3 Matatalab Products and Supplementary Materials:
3.4 Detailed Activity/Lesson Plan:
Note: If you are struggling using the Matatalab Edu classic activity plan template, other lessons/template formats are also acceptable. However, please write the instructions step by step. These steps should be clear, concise, and easily understood by other teachers who prepare the activity for their class. Teacher’s notes are encouraged to be added to the activity plan.
3.5 Essential Questions:
List the questions that students may ask and that need to be figured out in the activity.
3.6 Supporting Files:
Are there any other materials you can share with other educators? Some great supporting files include:
There are Matatalab Activities online. Please go to check the sample: Travel in Universe! (Click to check)
1. Lesson Objectives: Pass the quiz to receive the Tale-Bot Pro Course Certificate
2. Time: 20 mins
3. Language: English
4. Format: Completely Online
5. Level: Advanced
Final Quiz
Please the use window below to finish the final quiz. If your grade is equal to or higher than 12 points, you will receive the certificate by email. Please enter the correct email address so that we can send you the certificate. The whole quiz could be around 20 minutes.


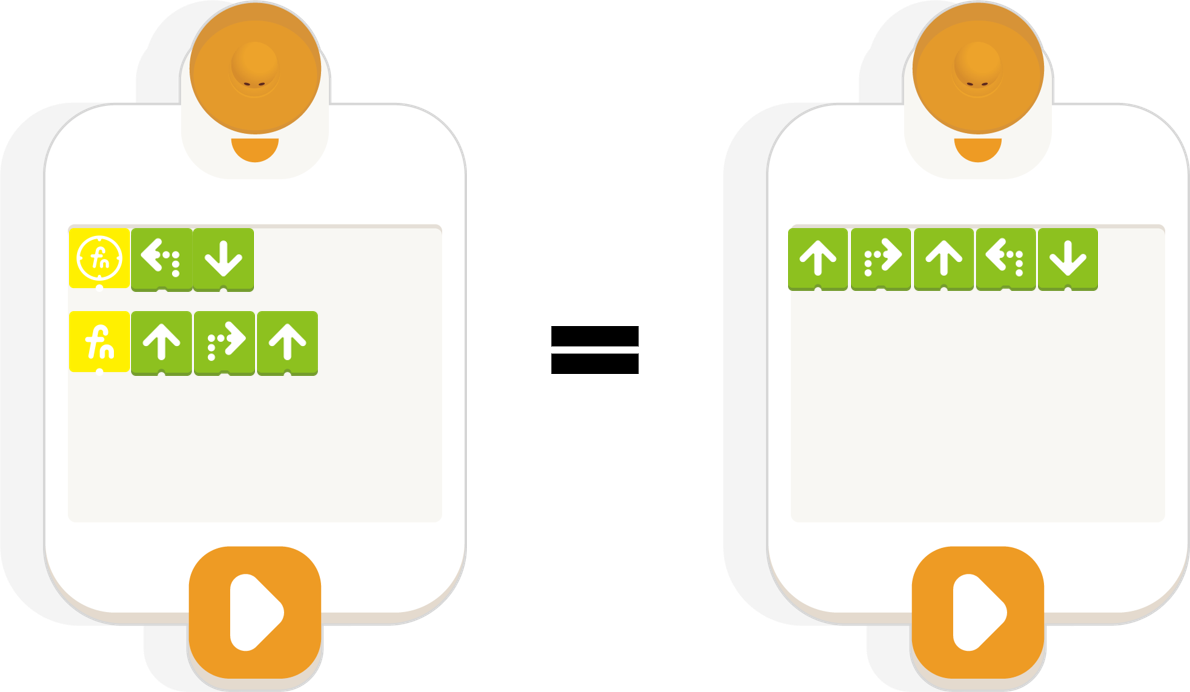
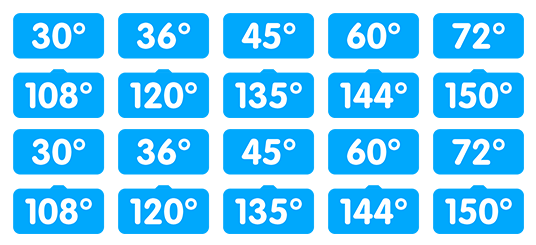
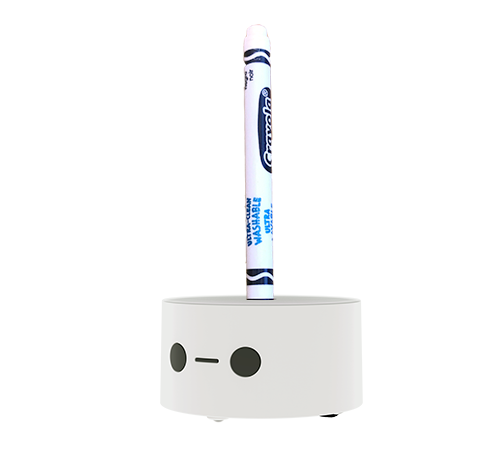
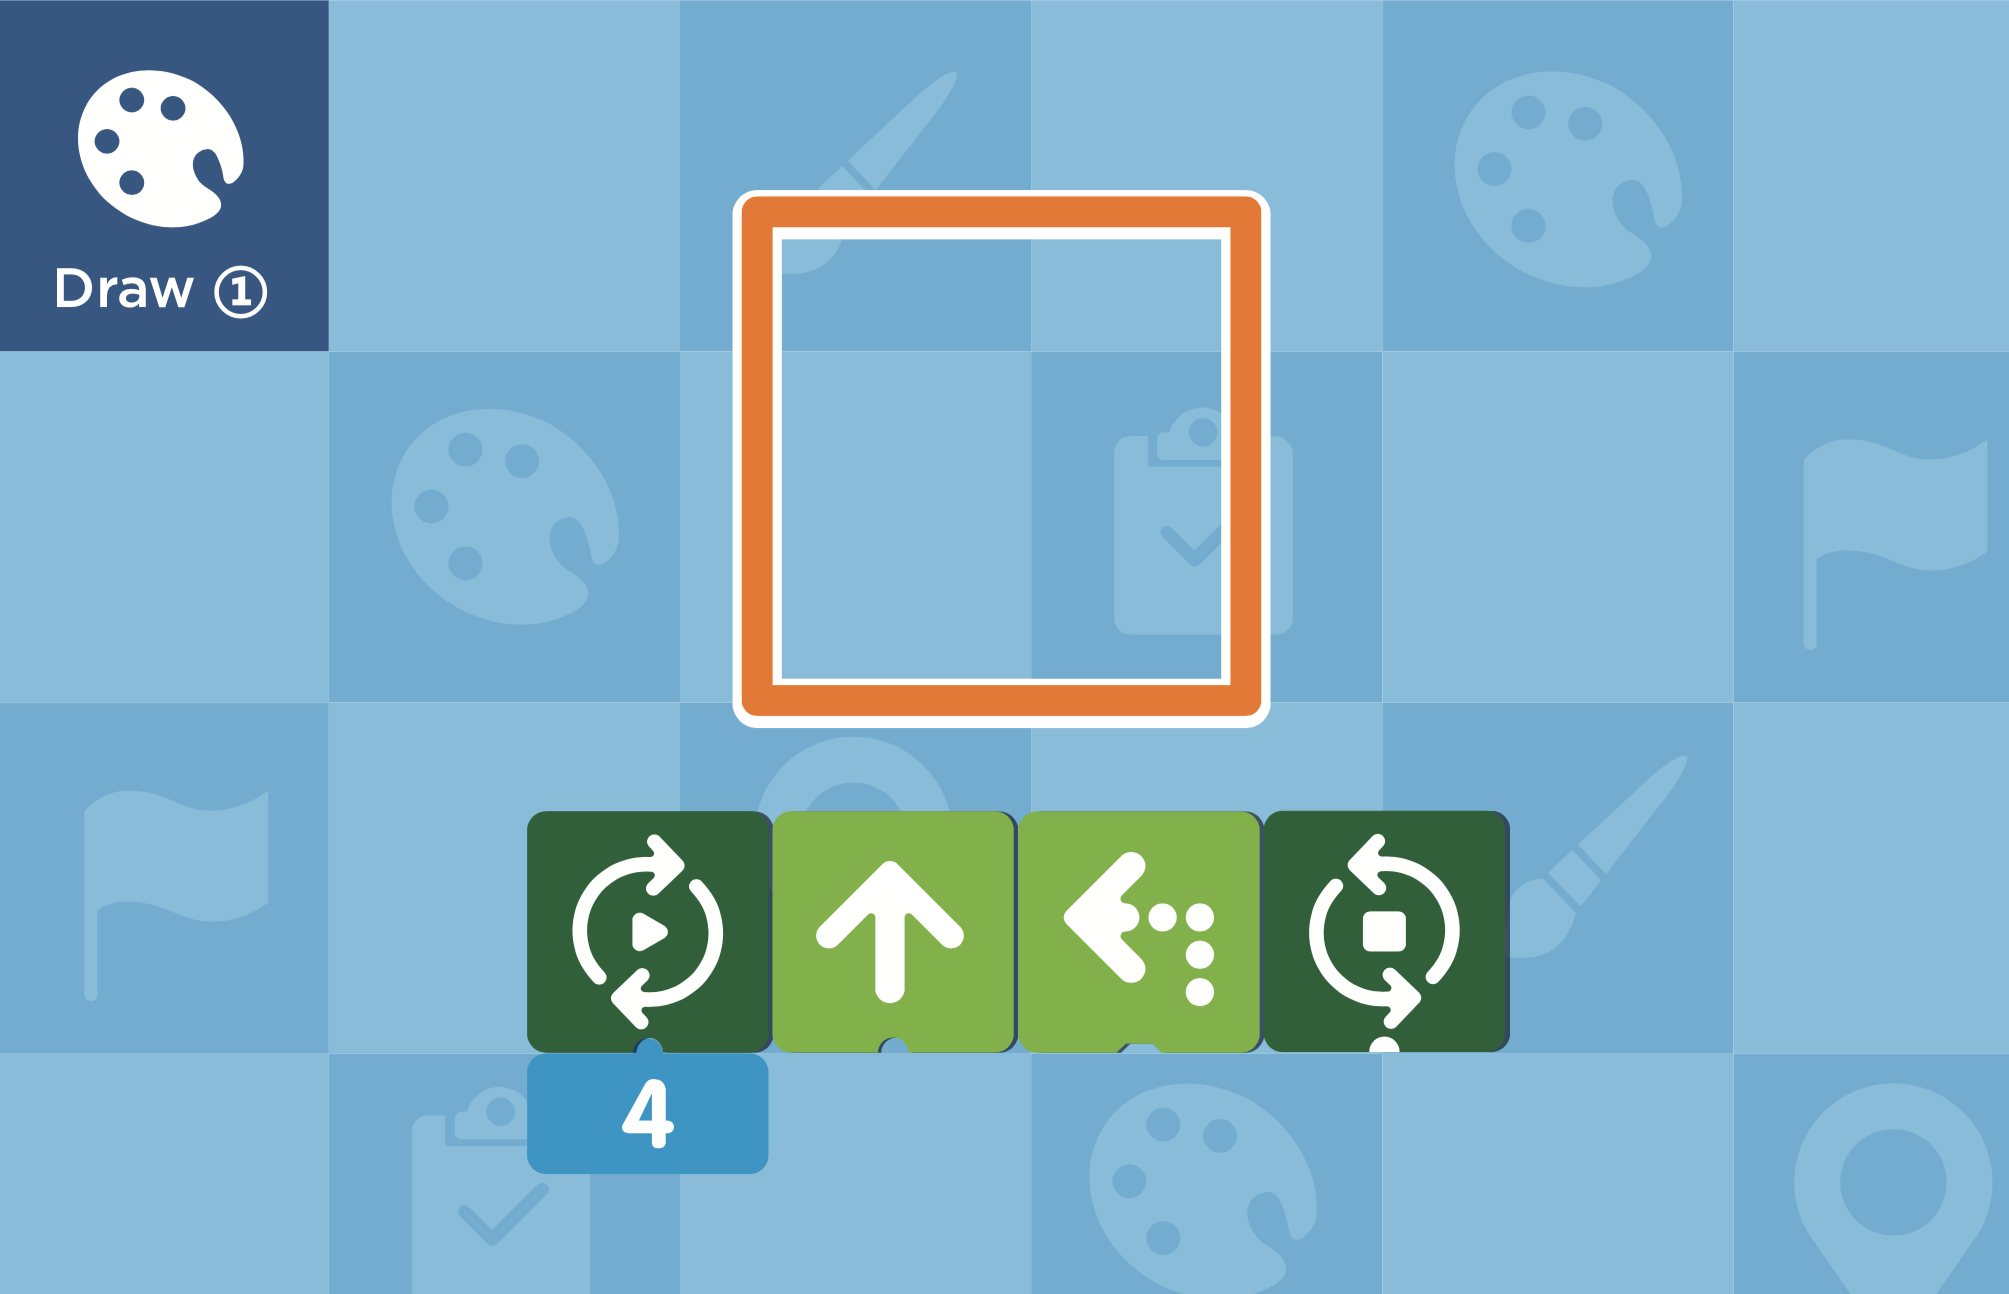
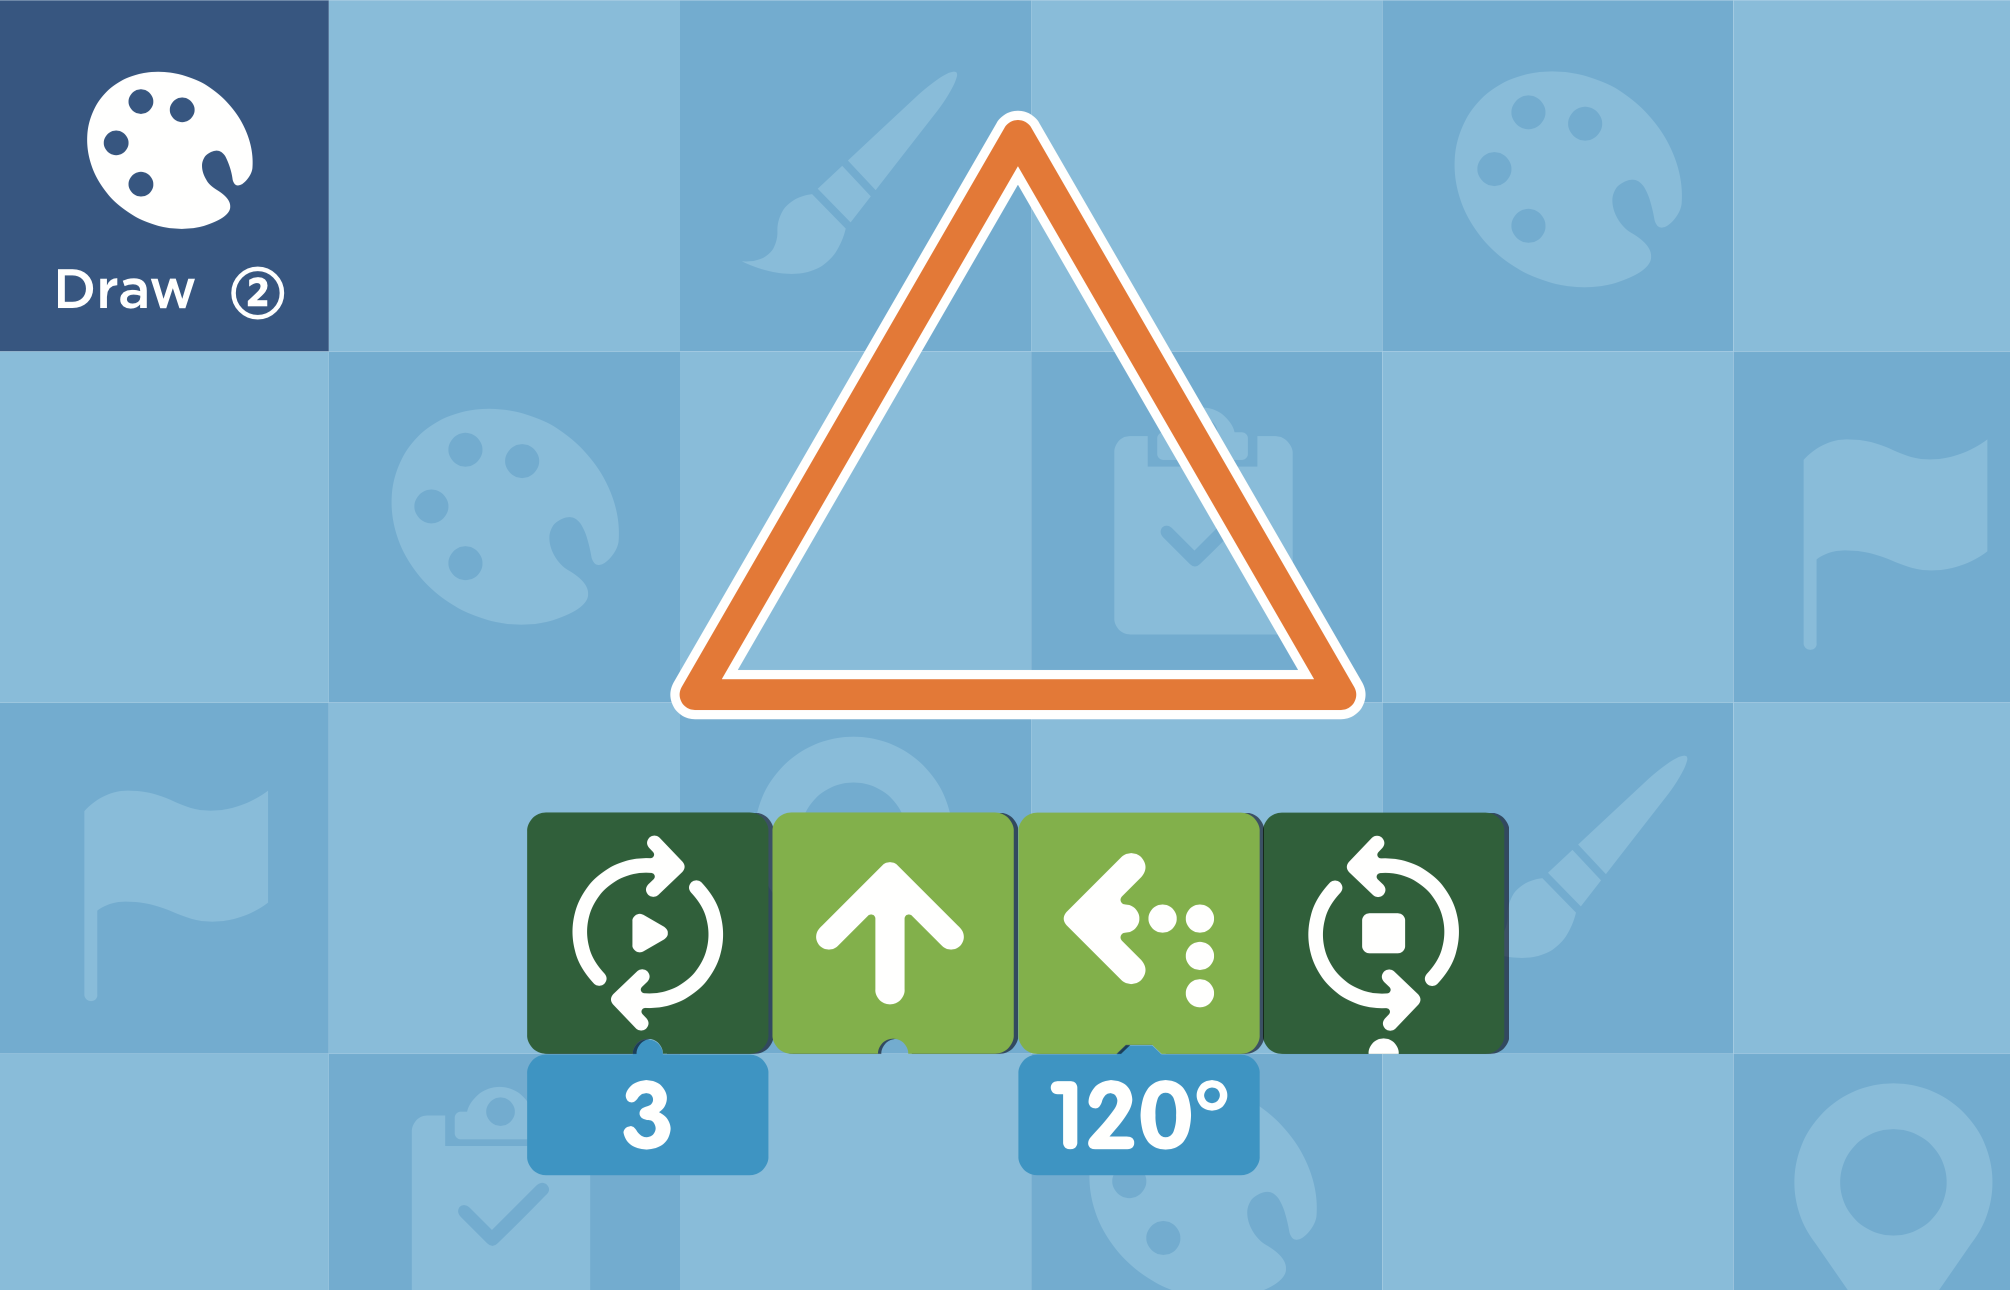
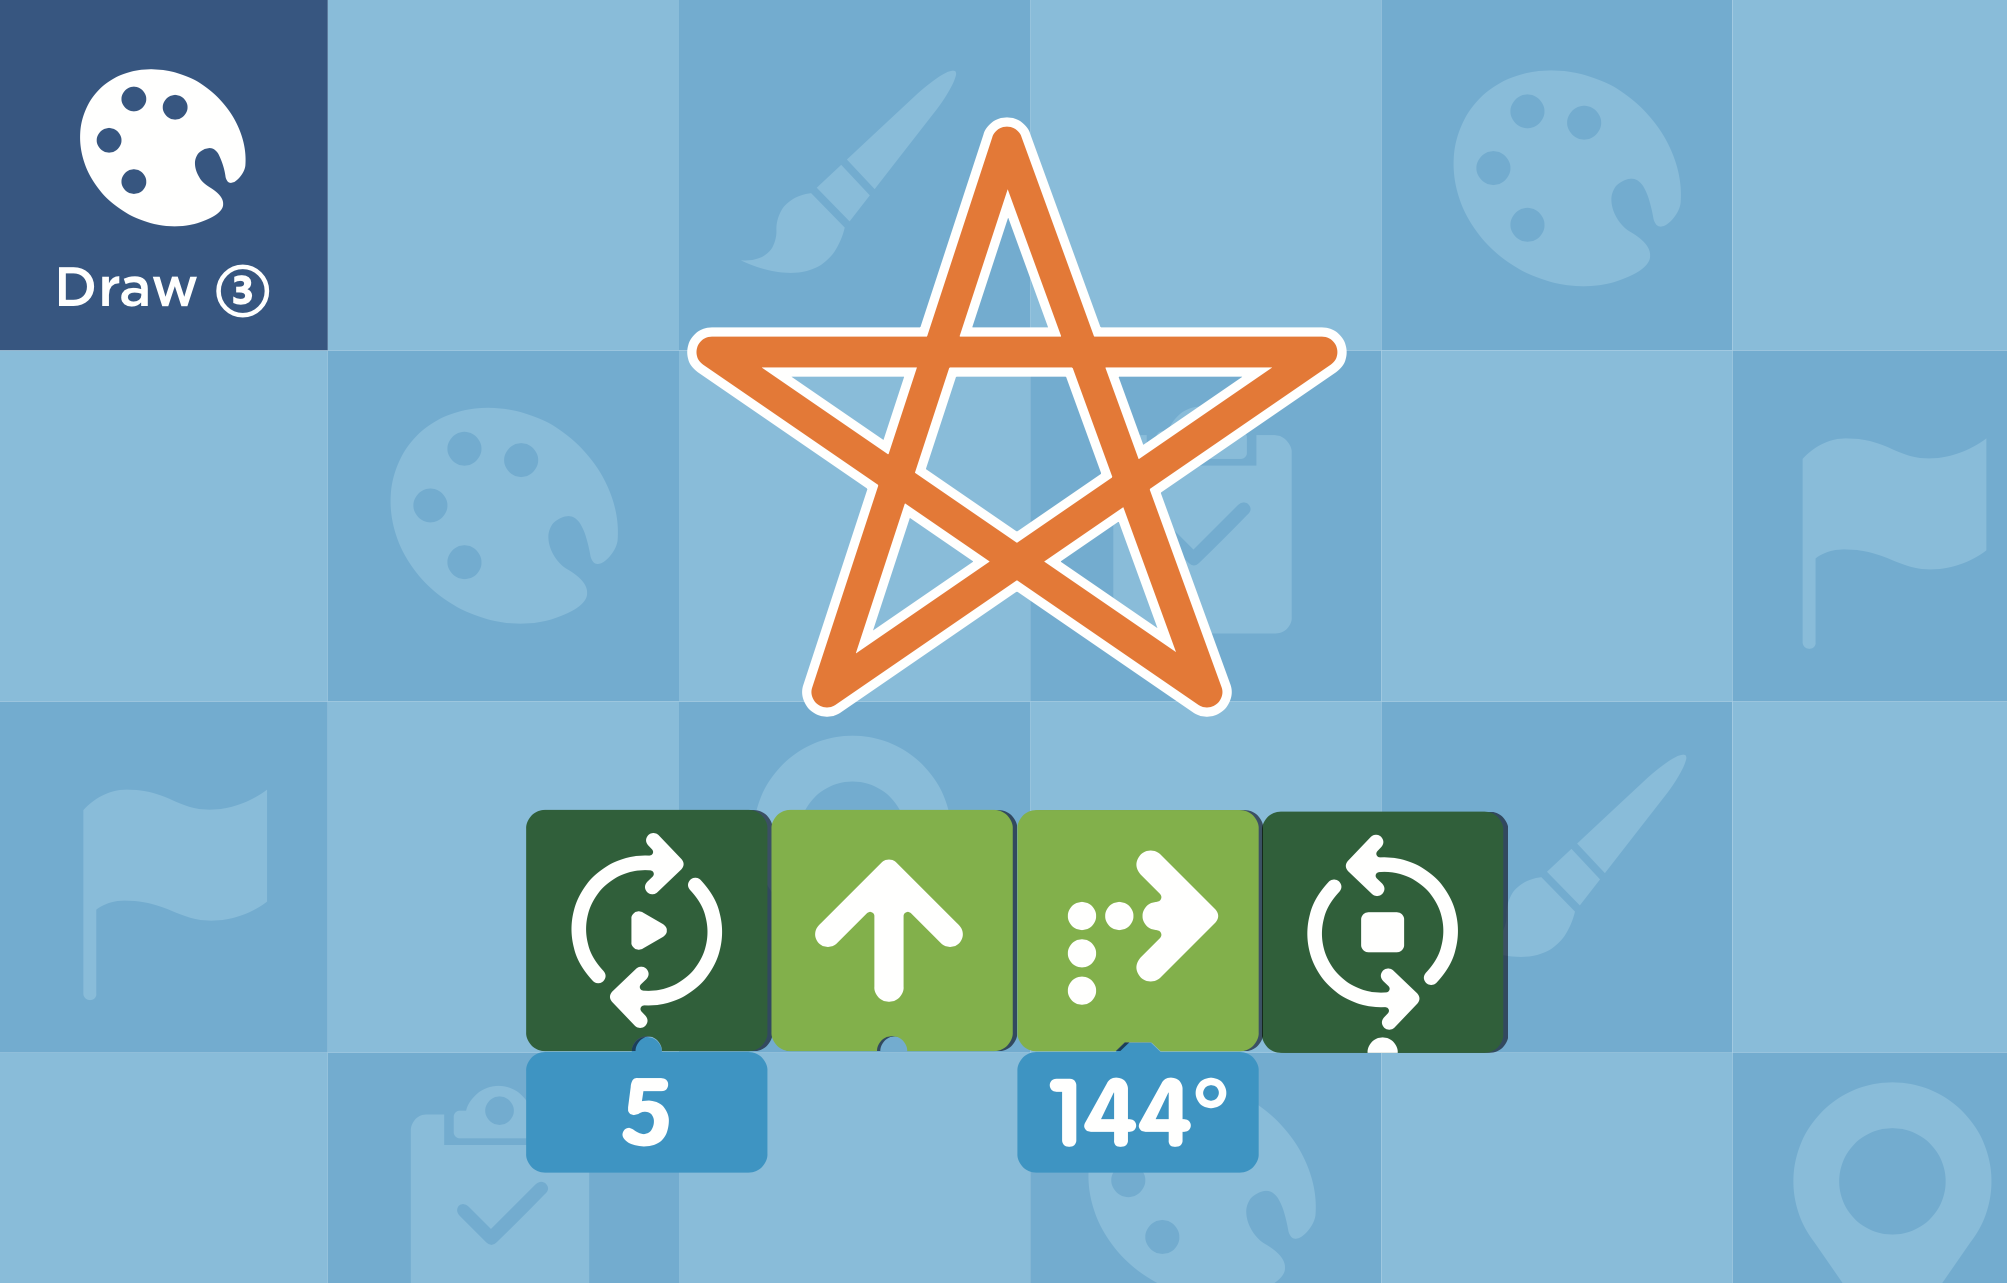
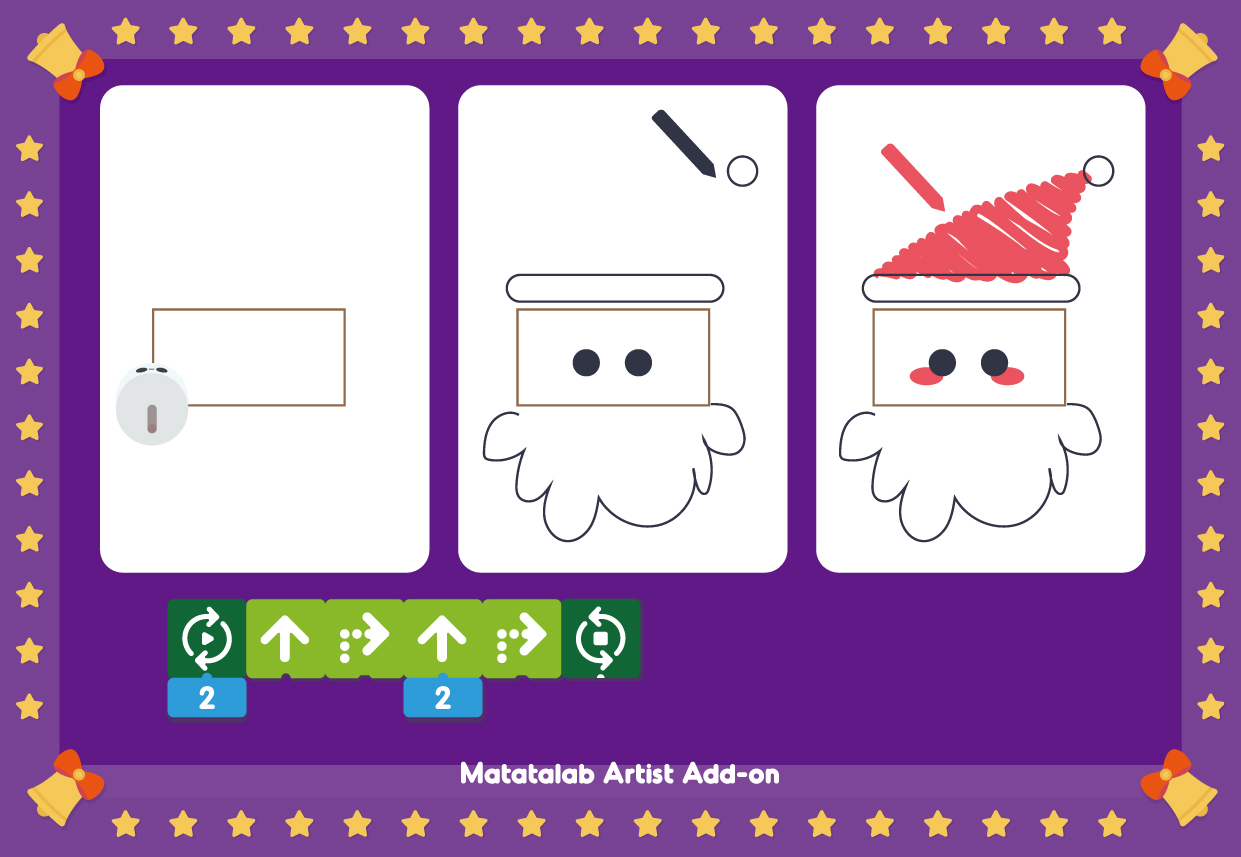
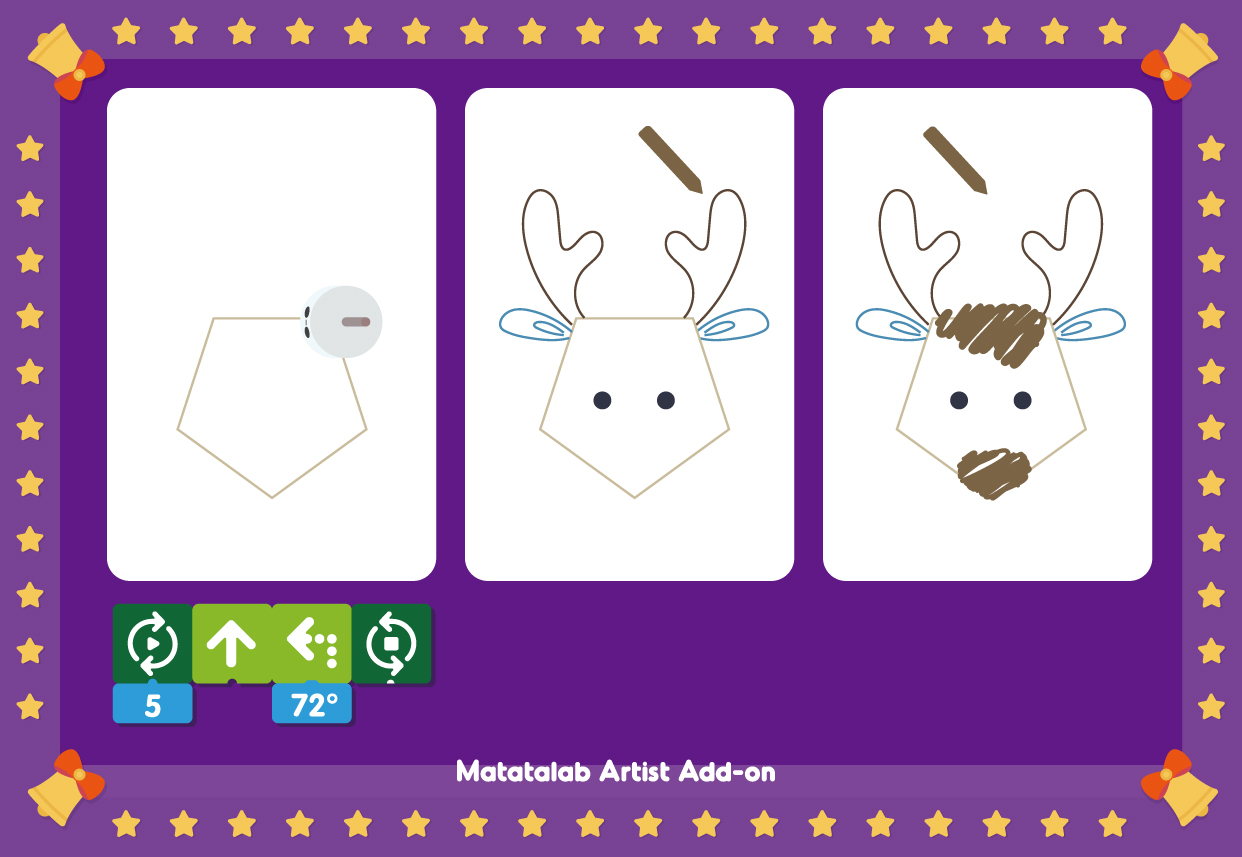


")


")

